How to Use a Paint Sprayer on a Ceiling in 5 Easy Steps
To use a paint sprayer on your ceiling, start by prepping the surface properly. Clean the ceiling to remove dust and cobwebs, then sand it lightly for better paint adhesion. Don’t forget to patch any holes or cracks to ensure a smooth finish.
Next, set up and prime your paint sprayer. Adjust the PSI to between 1500 and 2000 for smooth, controlled spraying. It’s a good idea to test the spray pattern on scrap material first. This helps you tweak the pressure and avoid drips or gaps in your paint coverage.
When you’re ready to paint, use steady, overlapping strokes. Hold the nozzle about 12 inches from the ceiling for the best results. This technique helps you cover evenly without runs or patches.
Finally, don’t forget to clean your equipment right after you finish. Proper cleaning keeps your sprayer in top shape and ready for your next project. Keep going to master the full technique for professional results!
Key Takeaways
- Prepare the ceiling by cleaning it first. Patch any holes, sand rough spots, and remove loose paint to create a smooth surface.
- Next, prime the paint sprayer. Set the PSI between 1500-2000. Don’t forget to clear the line by spraying into a bucket before you start.
- Adjust the spray pattern and pressure to your liking. Test it out on some scrap material to make sure you get even coverage without drips.
- When you’re ready, spray the ceiling with steady, slow strokes. Hold the nozzle about 12 inches away, perpendicular to the ceiling. Overlap your passes a bit for full coverage.
- Finally, clean the sprayer right after you finish. Flush the lines and disassemble the parts for a thorough cleaning and proper maintenance. It’ll keep your sprayer in great shape for next time!
Prepare the Ceiling Surface

Before you begin painting, make sure the ceiling is clean, dry, and free of dust, cobwebs, or loose paint. Start by clearing the area of furniture and covering floors and fixtures with drop cloths to protect against overspray.
Next, fill any holes or imperfections with a suitable patching compound. Once dry, sand these spots smooth to create a seamless surface.
Lightly sand the entire ceiling with a disc sander; this step promotes better paint adhesion and ensures a smooth finish. Remove any peeling paint or glossy surfaces to prevent peeling later.
If needed, apply a primer for better coverage. Taking these steps to prepare a clean, dry, and smooth ceiling surface guarantees a successful paint job.
Set Up and Prime the Paint Sprayer

Once your ceiling is prepped and smooth, it’s time to set up your paint sprayer for the job. First, connect the paint hose to your ceiling-specific flat paint and switch the sprayer on.
To prime the sprayer, lift the priming switch upward to fill the system with paint, then lower it to start line filling. Set the PSI dial to a mid-range pressure, typically between 1500-2000 PSI, to guarantee proper spray control.
Before you begin spraying the ceiling, spray into a bucket to clear any old paint or debris from the line. Listen for the machine’s pressure indicator or sound cues to confirm the sprayer is fully pressurized and ready.
Now, your paint sprayer is set up and primed for a smooth application. Easy, right? Just keep these steps in mind, and you’ll have a flawless ceiling finish in no time.
Adjust Spray Pattern and Pressure

Although you’ve set your sprayer’s pressure initially, you’ll need to modify the spray pattern and pressure to achieve the best results on your ceiling. Start by adjusting the PSI dial to a mid-range setting, ideal for ceilings.
Then, test the spray pattern on a piece of drywall or scrap material. Look for even coverage and a consistent width. If you see gaps or streaks, increase the pressure slightly.
If the paint drips or over-sprays, lower the pressure. Keep the spray gun about 12 inches from the ceiling and hold it perpendicular to the surface to maintain a uniform spray pattern.
Apply Paint With Proper Technique
After fine-tuning your spray pattern and pressure, it’s time to apply the paint with the right technique to get smooth, even coverage. Before you start spraying, test the spray on a piece of cardboard to confirm the pattern and pressure feel right.
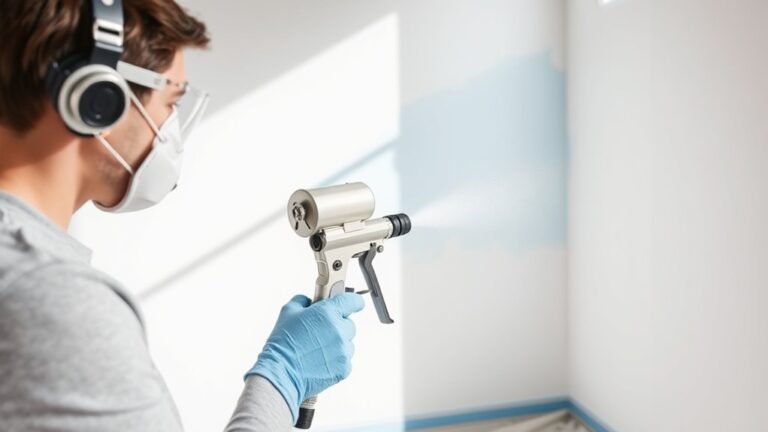
Keep spraying with steady, slow movements, holding the gun about 12 inches from the ceiling. Make sure the nozzle stays perpendicular to the surface to avoid drips or uneven texture.
Spray steadily and slowly, holding the gun 12 inches away with the nozzle perpendicular to the ceiling.
Overlap each pass slightly for seamless coverage without streaks or gaps.
- Maintain a consistent distance and steady spray pattern
- Use slow, controlled strokes to distribute paint evenly
- Overlap passes slightly to prevent visible lines
Following these tips ensures your ceiling gets a flawless finish every time.
Clean Up and Maintain Equipment
To keep your paint sprayer working smoothly, you should flush the spray line with water or paint thinner immediately after use to prevent clogs and residue buildup. Next, disassemble the spray gun and clean all parts thoroughly using warm, soapy water or the recommended solvent.
This step is vital for proper maintenance and ensures your equipment lasts longer. Check spray tips, seals, and filters regularly, replacing any worn or damaged components to maintain peak performance.
After cleaning, store your sprayer in a dry, clean area, removing any leftover paint to avoid drying or corrosion. Finally, lubricate moving parts periodically following the manufacturer’s guidelines.
Taking these steps will keep your paint gun ready for the next project and extend its lifespan. It’s definitely worth the effort!
Frequently Asked Questions
How to Paint a Ceiling Fast and Easy for Beginners?
You’ll prep by covering furniture and wearing safety gear.
Keep your sprayer about 12 inches from the ceiling, move steadily and perpendicular, and adjust pressure for smooth coverage.
Work in slow, controlled passes to paint quickly and easily.
How to Use a Paint Sprayer for Beginners?
You’ll start by adjusting the spray pattern and pressure on scrap material. Keep the sprayer about 12 inches away, move steadily with overlapping strokes, and adjust PSI for smooth coverage.
Practice guarantees professional results. It might take a few tries to get the hang of it, but once you do, your finish will look amazing! Just keep at it and you’ll be a pro in no time.
What Paint Sprayer Is Best for a Ceiling?
If you want to breeze through ceilings, choose a professional-grade airless sprayer with adjustable PSI around 1500-3000, a 12-inch spray pattern, and easy-clean parts.
It’ll keep your work smooth and mess-free. Plus, using the right sprayer makes the whole job feel way easier.
Is It Better to Spray or Roll Paint on Ceiling?
It’s better to spray paint on ceilings for faster, more even coverage with fewer streaks.
But if you’re working in tight spaces or want to avoid overspray, rolling might be a smarter choice for you.
Conclusion
Now that you know how to use a paint sprayer on your ceiling in just five easy steps, you’re ready to transform your space quickly and efficiently.
Did you know using a paint sprayer can cut your painting time by up to 50% compared to traditional brushes? With the right preparation, technique, and cleanup, you’ll achieve a smooth, professional finish every time.
So grab your sprayer and get started—you’ll love the results! Using a paint sprayer on a ceiling not only speeds up the job but also ensures even coverage with less effort. Trust me, once you try this method, you’ll wonder how you ever painted ceilings any other way.