10 Easy Steps to Clean Your Wagner Paint Sprayer After Oil-Based Paint
To clean your Wagner paint sprayer after using oil-based paint, start by disconnecting and disassembling the unit.
Remove the paint container, handle, and spray gun parts carefully. This step ensures you can access all the areas where paint might have settled.
Next, focus on cleaning the filter, nozzle, and needle. Soak these parts in mineral spirits and scrub them gently. Remember to wear gloves and work in a well-ventilated area to use mineral spirits safely.
After cleaning these components, flush the sprayer with clean water until the water runs clear. This helps remove any remaining paint residue.
Then, dry and inspect all parts thoroughly before reassembling the sprayer.
Finally, test spray on a scrap piece of material to ensure everything is working properly. Keep following these easy steps to maintain your Wagner paint sprayer’s performance and longevity.
Key Takeaways
– Disconnect power, disassemble the sprayer, and remove the paint container, nozzle, needle, and filters for thorough cleaning.
This helps you get to all the parts that come in contact with the paint.
– Soak the removed parts in mineral spirits and scrub gently to dissolve and remove dried oil-based paint residue.
It might take a little patience, but this step is key to keeping your sprayer in good shape.
– Use mineral spirits to flush the sprayer, spraying until the output is clear. Then rinse with soapy water followed by clean water.
This ensures all the paint and solvent are fully cleaned out.
– Wear gloves and eye protection, work in a well-ventilated area, and handle mineral spirits carefully because they’re flammable.
Safety first — it’s important to protect yourself while cleaning.
– Dry all components completely, inspect for any damage, then reassemble carefully.
Finally, perform a test spray to make sure everything’s working properly before your next project.
Disconnect and Prepare Your Wagner Paint Sprayer
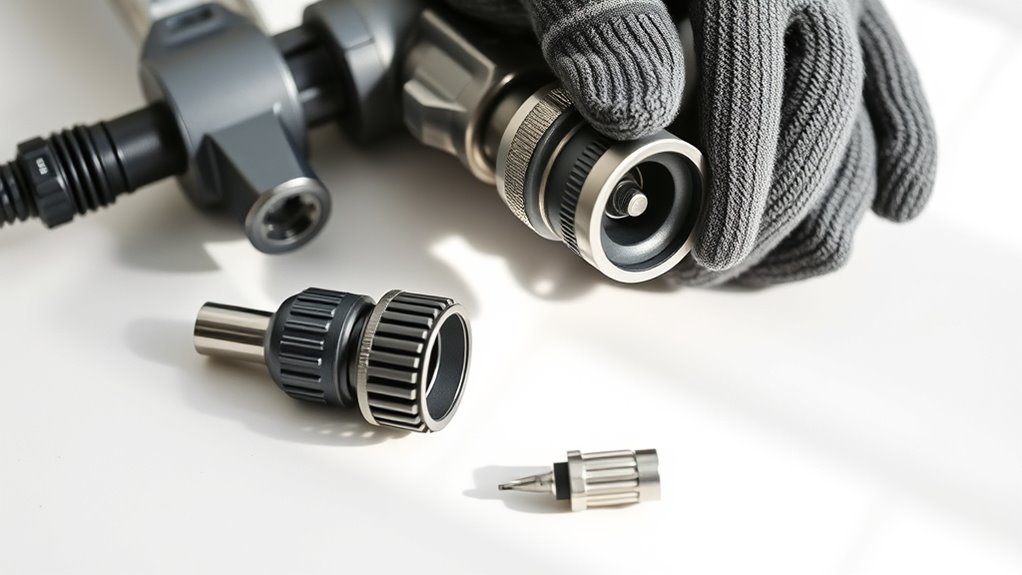
Before you begin cleaning your Wagner paint sprayer, always disconnect the power supply to guarantee your safety. This simple step prevents accidental starts and electric hazards while you work on your sprayer.
Once disconnected, remove the spray gun and detach the paint container to access all internal parts. Unscrew any connected hoses or components for a thorough cleaning.
Prepare the appropriate cleaning solution, like mineral spirits, especially suited for oil-based paints. Using the right cleaning solution ensures you effectively dissolve paint residues without damaging your equipment.
Taking these precautions and steps at the start helps you clean efficiently and safely, prolonging the life of your Wagner sprayer. Remember, safety comes first, so never skip disconnecting before handling any parts or liquids.
Remove and Inspect the Filter

After disconnecting and preparing your Wagner paint sprayer, the next step is to remove and inspect the filter. Depending on your model, you’ll either unscrew the filter or gently pull it out.
Once it’s out, take a close look for any clogs, dried paint, or debris that might be blocking the paint flow. To clean it properly, soak the filter in mineral spirits if you’ve used oil-based paint.
Inspect the filter for clogs or dried paint, and soak in mineral spirits if oil-based paint was used.
Use a soft brush or cloth to get rid of any stubborn residue, but be gentle so you don’t damage the filter material. Make sure the filter is completely clean, dry, and free of debris before putting it back.
Keeping the filter in good shape helps your sprayer work smoothly and prevents future clogs. It’s a simple step that can save you a lot of hassle down the road.
Detach the Handle and Unscrew the Paint Container
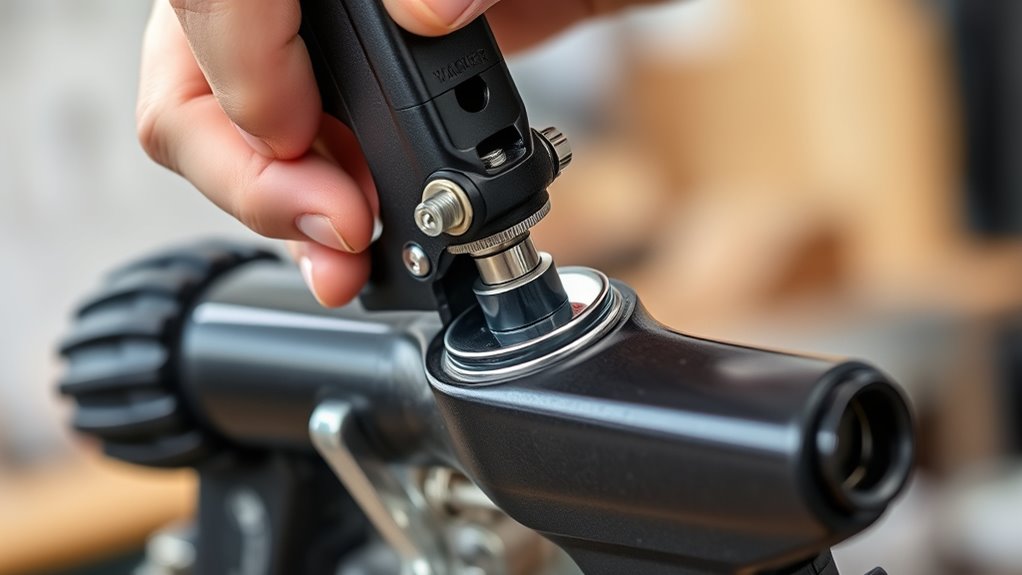
Once you detach the handle from your Wagner paint sprayer, you’ll gain easier access to the internal parts, making cleaning and maintenance much simpler. Start by carefully detaching the handle using a screwdriver to avoid damage, and keep track of all screws and small parts.
Next, unscrew the paint container slowly to release any built-up pressure gradually, preventing spills and accidents. As you remove the paint container, examine both it and the handle for any residual paint or debris that could affect performance.
Handling these components with care ensures you don’t damage the sprayer and makes reassembly straightforward. Taking these steps allows you to clean your Wagner paint sprayer thoroughly and keep it in top working condition.
Select the Appropriate Cleaning Solution for Oil-Based Paint
When cleaning oil-based paint from your Wagner sprayer, use mineral spirits or a solvent made for oil-based paints to break down residue effectively.
Always wear gloves and eye protection, and work in a well-ventilated area to stay safe.
Be sure to dilute the mineral spirits as directed to avoid damaging your sprayer components.
Mineral Spirits Usage
Since oil-based paints require a different cleaning approach, you’ll need to use mineral spirits to effectively dissolve and remove leftover paint from your Wagner paint sprayer.
Mineral spirits have a flash point of less than 40°C, so they produce enough vapor to clean your paint spray thoroughly but require careful handling.
Pour mineral spirits into a container and soak or flush parts to break down residual paint.
Afterward, rinse components with soapy water to remove solvent traces.
| Step | Action |
|---|---|
| Pour | Pour mineral spirits in a container |
| Soak/Flush | Soak or flush spray parts |
| Rinse | Rinse with soapy water |
Safety Precautions
Using mineral spirits to clean your Wagner paint sprayer effectively breaks down oil-based paint residues, but you’ll need to take safety precautions during this process. Always check the paint container label for recommended cleaning solutions and choose solvents with a flash point above 100ºF (38ºC) to reduce fire risks.
Handle these liquids in a well-ventilated area and wear protective gloves and goggles to avoid skin and eye contact. Avoid using highly flammable liquids with low flash points when you clean with liquids, as they increase fire hazards.
Make sure you follow the manufacturer’s safety guidelines closely and dispose of used solvents properly to prevent environmental contamination. By selecting the appropriate cleaning solution and observing these safety precautions, you’ll keep yourself and your workspace safe while maintaining your paint sprayer.
Disassemble the Spray Gun Components
Start by removing the spray gun’s guard and trigger to access the internal parts. Next, carefully unscrew and detach the nozzle and other removable components.
Finally, extract the needle by pulling the side pin, handling it gently to avoid damage.
Taking it slow here really helps prevent any accidental damage, so don’t rush through these steps!
Remove Guard and Trigger
To remove the guard and trigger from your Wagner paint sprayer, begin by unscrewing the retaining screws that hold the guard in place. Then, carefully detach it from the spray gun.
Next, use a screwdriver to unscrew and detach the trigger from the spray gun body. Gently pull out the trigger assembly, making sure not to damage the trigger pin or other connected parts.
As you disassemble these components, keep all screws and parts organized to avoid misplacing anything. Properly handling the guard and trigger ensures you can clean them thoroughly and reassemble your sprayer without issues.
Taking care during this step prevents damage and helps maintain the sprayer’s performance over time. It’s a simple process but doing it right really makes a difference!
Unscrew and Detach Parts
After removing the guard and trigger, you’ll want to unscrew the spray gun’s nozzle and other components to reach the internal parts for cleaning. Use the right tools to carefully unscrew each piece, avoiding forcing or stripping any parts.
Next, detach the paint cup and disconnect the suction tube to fully disassemble the sprayer. Pay close attention when detaching the needle; remove the side pin gently to prevent damage.
Keep track of every small part and screw you remove to make reassembly easier. By methodically unscrewing and detaching these parts, you ensure a thorough clean, which keeps your Wagner paint sprayer in top working condition after using oil-based paint.
Extract Needle Carefully
Although it requires patience and a steady hand, extracting the needle from your Wagner paint sprayer guarantees a thorough clean and prevents damage. First, disconnect the spray gun from the power source and remove the trigger to access the needle area easily.
Then, disassemble by unscrewing and detaching the nozzle and internal parts. To extract the needle, pull out the pin securing it while holding the needle steady. Carefully remove the needle without bending or scratching it.
Keep all parts organized and clean before reassembling. It might seem a bit tricky at first, but taking your time really pays off.
- Disconnect power and remove trigger
- Unscrew nozzle and internal components
- Pull out pin securing the needle
- Gently extract the needle without damage
- Organize and clean all disassembled parts
Clean the Nozzle, Needle, and Internal Parts Thoroughly
Since dried paint can clog your sprayer and reduce its performance, you’ll want to clean the nozzle, needle, and internal parts thoroughly using mineral spirits. First, carefully remove the nozzle and needle from your Wagner paint sprayer.
Remove the nozzle and needle to thoroughly clean dried paint with mineral spirits and maintain sprayer performance.
Soak these components in mineral spirits to dissolve any dried oil-based paint residues. Use a soft brush or Q-tips to scrub inside the nozzle and other internal parts, making sure all paint buildup is removed.
After scrubbing, rinse the parts with clean mineral spirits to wash away loosened debris. Finally, dry each piece completely before reassembling your sprayer.
Paying close attention to the nozzle and needle helps prevent blockages and keeps your sprayer working efficiently for your next project.
Use Mineral Spirits Safely for Residue Removal
When you use mineral spirits to clean your Wagner paint sprayer, make sure you’re working in a well-ventilated area and wearing protective gloves and goggles to stay safe. Mineral spirits effectively remove oil-based paint residues, but remember they are liquids with a flash point below 100ºF (38ºC).
So, handle and store them carefully to prevent fire hazards. Before you start, check your sprayer’s manual to confirm compatibility. Use the mineral spirits to dissolve paint buildup, then rinse thoroughly afterward to avoid chemical buildup.
Keep mineral spirits in a sealed container and store it away from heat sources. Open windows or use fans for ventilation. Always wear gloves and goggles during cleaning.
Avoid open flames due to the low flash point. Use a clean cloth soaked in mineral spirits, and store the container tightly sealed in a cool place.
Rinse and Flush the Sprayer With Clean Water
Now that you’ve used mineral spirits, it’s essential to rinse your Wagner sprayer thoroughly with clean water to remove any leftover solvent or paint.
Fill the container with water and spray in short bursts to flush out all internal parts until the water runs clear. This careful flushing ensures your sprayer stays in top condition and ready for the next project.
Importance of Thorough Rinsing
Although cleaning removes most paint and solvent, you should always rinse and flush your Wagner paint sprayer with clean water to prevent residue buildup. Thorough rinsing eliminates residual solvent that can clog the sprayer, ensuring your device maintains peak spray performance.
Without proper rinsing, mineral spirits and paint residues may dry inside, causing damage or operational issues. Flushing until the water runs clear confirms all residues are gone.
After rinsing, let every component dry completely to avoid corrosion and prepare the sprayer for future use. Visualize this process as:
- Clear water running steadily from the nozzle
- No paint streaks inside the hose
- Clean, residue-free filters
- Dry, spotless internal parts
- Smooth, uninterrupted spray flow
This care keeps your sprayer ready and efficient every time.
Flushing Steps Explained
Because residual solvent and paint traces can clog your Wagner paint sprayer, you’ll want to flush it thoroughly with clean water after using mineral spirits. Start by filling the paint container with clean water, then operate the sprayer to circulate the water through all internal parts.
This flush helps remove any leftover solvent and paint residue. While flushing, use a soft brush or rag to wipe down internal components for a deeper clean.
Repeat this rinsing process multiple times until the water runs clear, ensuring all residual material is gone. Finally, let all parts dry completely before reassembling or storing the sprayer to prevent rust and buildup.
This thorough flush maintains your sprayer’s performance and longevity. It’s a simple step that really pays off in the long run!
Water Usage Tips
When you finish using oil-based paint, flush your Wagner paint sprayer immediately with clean water to prevent clogging and remove leftover residue. Use plenty of water to rinse all internal parts thoroughly, ensuring no paint residues remain.
Keep flushing until the water runs clear, signaling that all paint and solvent residues are gone. Operate in a well-ventilated area to avoid fumes.
After flushing, disassemble and dry parts completely before reassembling to avoid corrosion.
- Fill the sprayer’s container with clean water
- Spray water through the nozzle repeatedly
- Watch for clear water flow with no paint streaks
- Remove and dry key components carefully
- Store sprayer in a dry place after cleaning
These water usage tips help keep your sprayer in top shape.
Dry and Inspect All Components Before Reassembly
Before you reassemble your Wagner paint sprayer, make sure every component is completely dry to prevent mold or corrosion during storage. You can let the parts air dry or simply wipe each one with a clean cloth to get rid of any moisture.
Next, take a close look at all the components for any cracks, wear, or damage that might affect how well it works. Be sure to check seals and nozzles carefully—no paint residue or debris should be left behind.
Using a flashlight can really help you spot hidden buildup inside those hard-to-see internal areas. Doing this thorough inspection now will save you from clogs later and keep your spray quality top-notch.
Only when every part is dry and free from damage or leftover paint should you start putting everything back together. Taking these simple steps protects your sprayer and ensures it’s ready for your next project.
Reassemble the Sprayer and Perform a Test Spray
Once all the parts are completely dry, you can start reassembling your Wagner paint sprayer by carefully attaching the needle, trigger, and other components. Make sure every connection is tight and secure.
Begin reassembling your Wagner paint sprayer by securely attaching the needle, trigger, and all components once dry.
As you reassemble, reinstall the filter and accessories properly to prevent spray issues. After assembly, perform a test spray on a scrap surface to check the sprayer’s function.
Watch for any leaks or uneven spray patterns and tighten parts if needed. This ensures your sprayer is ready for your project without surprises.
- Attach needle and trigger firmly
- Reinstall filter and accessories
- Secure all connections tightly
- Test spray on scrap surface
- Inspect for leaks and adjust
Following these steps helps you avoid leaks and ensures an even spray.
Frequently Asked Questions
How Do I Clean My Paint Sprayer After Applying Oil-Based Paint?
You flush your sprayer with mineral spirits right after using oil-based paint. Then, disassemble and clean all parts with mineral spirits and a soft brush.
Rinse with warm water, dry thoroughly, and reassemble to prevent clogs. It’s pretty straightforward, but doing it right keeps your sprayer in great shape for next time.
How to Clean Wagner Paint Sprayer After Use?
Disconnect your Wagner sprayer and empty the paint container. Then, clean all parts with mineral spirits to get rid of any leftover paint.
Make sure to scrub the nozzle and needle carefully. After that, rinse everything thoroughly.
Next, flush the system with clean mineral spirits to clear out any remaining residue. Once that’s done, reassemble your sprayer and store it properly until next time.
Can I Use Oil-Based Paint in a Wagner Sprayer?
You can use oil-based paint in some Wagner sprayers, but you must check your model first.
If it’s compatible, clean it thoroughly with mineral spirits afterward to avoid clogs and damage—protect your sprayer, protect your project.
Do I Need to Dilute Paint for Wagner Sprayer?
Yes, you’ll usually need to dilute oil-based paint with mineral spirits about 10-20% for your Wagner sprayer. This guarantees smooth spraying and prevents clogging.
Always check the paint’s instructions and test the mixture first. That way, you’ll know it works well with your sprayer before you start the main job.
Conclusion
Now that you’ve cleaned your Wagner paint sprayer after using oil-based paint, you’re all set to tackle your next project without a hitch. Taking these simple steps guarantees your sprayer stays in tip-top shape, ready to deliver flawless results every time.
Remember, a little effort now saves you a world of trouble later—don’t let a messy cleanup come back to bite you. Keeping your Wagner paint sprayer clean not only extends its life but also ensures smooth, even coats with every use.
So, keep it clean, and happy painting! Proper maintenance after using oil-based paint means your sprayer will always be ready to perform at its best when you need it.