7 Easy Steps to Use an Electric Paint Sprayer
To use an electric paint sprayer easily and get professional results, start by straining and thinning your paint until it reaches a smooth, skim-milk consistency. This step is crucial to prevent clogs and ensure an even spray.
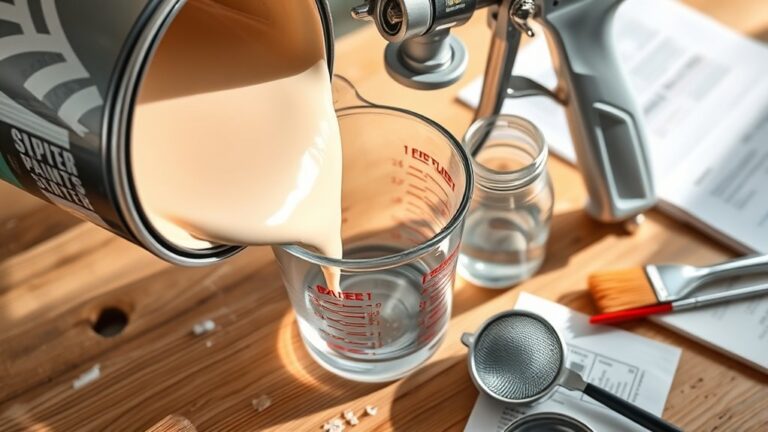
Next, pour the paint into the sprayer’s container but be careful not to overfill it.
Before you start painting your project, test the spray pattern on some scrap material. This helps you adjust the settings to get the perfect spray every time.
Hold the sprayer steady about 6-12 inches from the surface.
Use even, overlapping strokes to apply the paint smoothly and avoid streaks.
When you’re finished, don’t forget to clean and flush the system thoroughly before storing your sprayer.
Keep practicing these simple steps, and you’ll master your electric paint sprayer in no time!
Key Takeaways
– Prepare and thin paint properly, ensuring consistent texture. Test spray on scrap material for optimal flow.
This helps you get the best results without any surprises.
– Fill the sprayer container with strained paint and secure it tightly. Before you start, test the spray pattern on a scrap surface.
This way, you know exactly how the paint will come out.
– Hold the sprayer 6-12 inches from the surface. Use steady, overlapping strokes at a controlled speed for even coverage.
Keep your hand moving smoothly to avoid drips or uneven spots.
– Clean the sprayer thoroughly after use by flushing with water or solvent until clear. Don’t forget to wipe all external parts as well.
A clean sprayer works better and lasts longer.
– Store the sprayer in a dry place after reassembling. Perform a quick test spray to make sure it’s ready for next time.
That way, you won’t have to troubleshoot when you’re in a hurry.
Prepare Your Paint for Spraying

Before you begin spraying, make sure to strain your paint through a fine mesh filter to catch any lumps or debris. This step prevents clogging and assures a smooth finish.
Strain your paint through a fine mesh filter first to prevent clogs and ensure a flawless finish.
If your paint feels a little bit thick, you’ll want to thin it, but we’ll cover that later. Right now, focus on mixing your paint thoroughly with a stir stick or drill attachment to keep the consistency even.
When I’m going to use my sprayer, I always test the paint on a scrap piece first. This helps me spot any issues early, so I can adjust before starting the actual project.
Taking these simple prep steps saves you from problems later and helps your paint job look professional.
Thin the Paint to the Right Consistency

You’ll want to choose the right paint thinner that matches your paint type to guarantee smooth spraying. Thin the paint gradually, aiming for a consistency similar to skim milk.
Always test your spray on a scrap surface and adjust the thinning until you get a clean, even pattern. That way, you’ll avoid any surprises when you start on your actual project.
Choose Appropriate Paint Thinner
When thinning paint for your electric sprayer, use a compatible thinner recommended by the manufacturer to make certain of the right consistency. Start by gradually adding the thinner to your paint, mixing thoroughly until it becomes smooth and pourable without any gel-like thickness.
Typically, oil-based paints require about 10-20% thinner, but always adjust according to your paint type and desired spray pattern. Avoid over-thinning, as it can lead to drips or uneven coverage.
Following the paint and thinner manufacturer’s guidelines ensures ideal results and prevents damage to your sprayer. Taking these steps helps your paint flow evenly, reducing the risk of clogging and improving the overall finish of your project.
Test Spray Consistency
Although thinning the paint correctly can be tricky, testing the spray consistency guarantees your electric sprayer delivers a smooth, even coat without clogging or drips. Start by thinning the paint gradually, about 10-20%, until it flows smoothly.
Use a test surface like cardboard to check the spray pattern and coverage. Keep adjusting the ratio as needed to avoid drips or uneven spray.
Monitor the paint’s viscosity by running a stir stick through it; it should drip slowly and steadily. Throughout your project, consistently test and tweak the mixture to maintain a uniform finish.
Here’s what to focus on:
- Thin paint for smooth flow without clogging
- Spray on a test surface to check coverage
- Start with a small thinner amount, increase gradually
- Use viscosity tests to gauge paint thickness
- Adjust mixture regularly during the job
Pour the Paint Into the Sprayer Container

Make sure you’ve chosen the right paint and thinned it properly before pouring it into the sprayer container. Pour slowly to avoid spills, using a funnel if needed, and don’t fill past three-quarters full.
This helps keep the sprayer running smoothly without clogs or leaks. It’s a simple step, but it makes a big difference!
Choosing the Right Paint
How do you guarantee smooth, clog-free spraying with your electric paint sprayer? It starts with choosing the right paint and preparing it correctly before pouring it into the sprayer container.
Follow these vital steps: Use the recommended paint type (oil-based or latex) compatible with your sprayer. Strain the paint to remove lumps and debris that could clog the nozzle.
Pour the paint slowly to avoid spills and control the amount. Also, fill only up to the maximum fill line to maintain proper pressure.
Make sure to securely attach the container to prevent leaks during operation. That way, you’ll get the best performance from your sprayer every time.
Proper Paint Thinning
Wondering how to get the perfect paint consistency for your sprayer? Start by pouring the desired amount of paint into a clean container, making sure not to exceed your sprayer’s capacity.
Check the paint’s thickness—if it’s too thick, add a suitable thinner gradually while stirring. Use a stir stick or paddle to mix thoroughly, avoiding lumps or uneven texture.
Next, strain the paint through a fine mesh filter to catch any clumps or debris that might clog the nozzle. Finally, carefully transfer the thinned and filtered paint into your sprayer’s container, taking care not to trap air bubbles.
This guarantees a smooth, consistent spray flow, giving you a professional finish every time. Easy, right? Just take it step by step, and you’ll nail it!
Test the Spray Pattern Before Starting
Before you start painting, test the spray pattern on a scrap piece or cardboard to guarantee even coverage. This step helps you spot any inconsistencies early and avoid uneven paint application on your project.
Hold the spray gun about 6-12 inches from the test surface and move it steadily to observe the spray’s width and flow. If the pattern looks off, adjust the nozzle or settings accordingly. Keep tweaking until you get a smooth, uniform spray.
- Use scrap material similar to your project surface for accurate results
- Check for consistent spray width and paint flow
- Adjust pressure, flow rate, or nozzle size as needed
- Ensure the spray pattern fully covers the test area without gaps
- Repeat testing after each adjustment to confirm improvements
Hold the Sprayer Correctly and Maintain Distance
While holding the electric paint sprayer firmly and comfortably, you’ll maintain control and prevent uneven paint application. Grip the sprayer with confidence to keep your hand steady throughout the job.
Keep the nozzle about 6 to 12 inches from the surface to guarantee even coverage. Holding it too close can cause paint buildup and drips, while too far away results in patchy, uneven layers.
Maintaining a consistent distance is key to achieving a smooth, uniform finish on your furniture. Practice steady hand movements and proper spacing to minimize paint waste and get professional-looking results.
With the right hold and distance, you’ll make your painting project easier and more efficient every time.
Apply Paint in Even, Overlapping Strokes
To achieve a smooth, professional finish, apply paint using even, overlapping strokes. This technique helps you avoid streaks and guarantees uniform coverage across the surface.
Keep the spray gun steady and move at a controlled speed for consistent paint buildup without drips. Remember to maintain a distance of 6-12 inches from the surface to optimize spray pattern and coverage.
Adjust settings based on your paint’s consistency and the surface type for best results. Before starting your project, practice on scrap material to perfect your overlapping technique.
- Hold the spray gun steady, moving it smoothly across the surface
- Overlap each stroke slightly to cover any gaps
- Keep a consistent distance of 6-12 inches
- Adjust spray pattern and flow rate as needed
- Practice on scrap for confidence and control
Clean the Sprayer Thoroughly After Use
Since leftover paint can clog your sprayer and damage its parts, you’ll want to clean it thoroughly right after use. Start by disassembling the paint gun following the manufacturer’s instructions to access all internal components.
Rinse the paint container and nozzle immediately with the appropriate solvent or water to prevent paint from drying inside. Use a brush or cleaning tool to scrub any remaining paint from the spray tip and filters.
Next, run clean solvent or water through the sprayer until the liquid runs clear, ensuring all paint residue is removed. Finally, reassemble the sprayer and perform a test spray with clean water or solvent to confirm it’s fully cleaned and ready for storage.
Proper cleaning keeps your sprayer in top condition for future projects. It might seem like extra work, but trust me, it’s worth it!
Frequently Asked Questions
How Do You Use a Paint Sprayer for Beginners?
You start by thinning your paint properly, then hold the sprayer 6-12 inches away.
Move it steadily in overlapping strokes, adjust settings as needed, and clean the sprayer thoroughly afterward to keep it working smoothly.
It’s pretty straightforward once you get the hang of it! Just take your time and make sure everything’s set before you begin.
Do You Have to Thin Paint for an Electric Paint Sprayer?
You do have to thin paint for an electric sprayer, like adding water to soup to get the right flavor. Thinning guarantees smooth spraying, prevents clogs, and gives you an even, professional-looking finish every time.
Think of it this way: if the paint is too thick, it won’t spray properly. It might splatter or clog the sprayer. So, thinning helps everything flow just right.
What Are the Most Common Mistakes When Using Spray Paint?
You’ll often hold the sprayer too close, move it unevenly, or skip thinning and stirring paint.
Testing on scrap is essential, so don’t neglect it—otherwise, you’ll get drips, streaks, and clogged nozzles.
Trust me, taking a little extra time to prep makes a huge difference in the finish.
What Is the Number One Rule When Using an Airless Spray Gun?
The number one rule when using an airless spray gun is to always wear proper protective gear, like a mask, goggles, and gloves.
This keeps you safe from harmful paint fumes and prevents skin contact. It’s super important to protect yourself because the paint and fumes can be pretty nasty.
Conclusion
Now that you’ve got the hang of these simple steps, using your electric paint sprayer will feel like a breeze. Just remember, patience and practice are your best friends—think of your sprayer as a magic wand bringing your walls to life.
Keep your strokes even and your sprayer clean, and you’ll achieve a flawless finish every time. With consistent use of your electric paint sprayer, painting becomes quicker and more enjoyable.
Soon, you’ll wonder how you ever painted without it! By following these easy steps, your electric paint sprayer will help you transform your space with professional-looking results every time.