How You Can Paint Wood With Spray Paint Step by Step
To paint wood with spray paint, start by cleaning the surface thoroughly. This removes any dirt or grime that could affect your finish. Then, lightly sand the wood to smooth out any rough patches.
Next, apply a spray primer. Use thin, even coats and make sure each layer dries before you add more. This step helps the paint stick better and last longer.
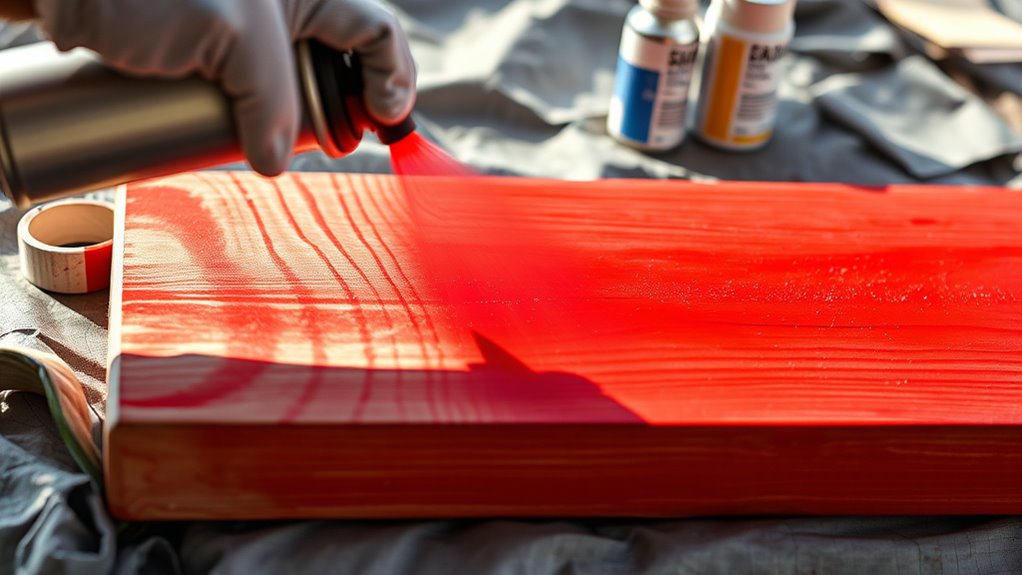
Shake your spray paint can well before use. Hold it about 8-12 inches away from the wood and spray multiple light coats. This prevents drips and gives a smooth finish.
Don’t forget to sand lightly between coats for an even surface.
Finally, let the last layer cure completely. Keep reading for more tips that’ll help your painted wood look professional and last for years!
Key Takeaways
- Clean and sand the wood surface to remove dirt and create smoothness for better paint adhesion. This step is really important to get a nice, even finish.
- Apply a spray primer in thin, even coats and let it dry completely before painting. Taking your time here will help the paint stick better.
- Shake the spray paint can well and apply multiple light, even coats from 8 to 12 inches away. Don’t rush it! Light coats help avoid drips and give a smoother look.
- Lightly sand between paint coats with fine-grit sandpaper to ensure smoothness and adhesion. This little extra step makes a big difference in the final feel.
- Allow the final coat to fully cure and consider a clear topcoat for added protection and shine. This will keep your paint job looking fresh and vibrant for longer.
Preparing and Priming Wood for Spray Painting

Before you start spray painting, make sure to clean the wood thoroughly with a degreaser or mild soap and water. This will remove any dirt, grease, or oils. This prep work is essential for a smooth finish.
Next, lightly sand the wood using fine-grit sandpaper, following the grain to smooth rough spots. This also helps the primer stick better. After sanding, use a tack cloth or a damp lint-free cloth to remove all the dust. You want the surface to be spotless.
Don’t forget to remove any hardware or tape off areas you don’t want painted. When you’re ready, apply a spray primer in thin, even coats, holding the can 8 to 12 inches away. Let each coat dry completely before adding the next.
Proper prep and priming will set your furniture up for a flawless spray painting finish. It really makes a difference!
Applying and Finishing Spray Paint on Wood

Once you’ve prepped and primed your wood, shake the spray paint can well and hold it 8 to 12 inches from the surface to apply thin, even coats. Use light coats of spray to avoid drips and guarantee smooth coverage.
After each coat of paint, let it dry completely before applying the next. Between coats, lightly sand smooth with 320-grit sandpaper to promote adhesion and a flawless finish.
When spray painting furniture or any wood project, use a spray paint designed for wood to achieve the proper spray consistency.
After the final coat, allow the paint to cure fully. Your spray painted wood will look professional and durable, especially if you choose to add a clear topcoat after the paint dries, protecting your work and enhancing its sheen.
Frequently Asked Questions
Can I Spray Paint Directly on Wood?
Yes, you can spray paint directly on wood, but you’ll want to clean, sand, and prime it first. This helps the paint stick better and last longer.
Doing this also gives you a smooth, durable finish without drips or runs. It’s worth taking a little extra time upfront for a great result.
What Kind of Spray Paint Works Best on Wood?
You’ll want spray paints like Rust-Oleum or Krylon—they stick to wood better than a magnet on steel!
Oil-based paints offer durability, while water-based ones are perfect for easy indoor cleanup with low fumes.
What Happens if You Spray Paint Wood Without Primer?
If you spray paint wood without primer, you’ll likely get uneven color, blotches, and peeling over time. The paint won’t stick well.
Dark woods might even bleed through, ruining your finish and requiring extra coats. So, it’s usually worth taking the extra step to prime first!
How to Get Wood Effect With Spray Paint?
You start by spraying thin base coats. Then, add a darker glaze to create grain using a damp cloth.
Layer different shades for depth. Lightly sand to add some texture.
Finish up with a clear topcoat to seal the wood effect. Easy, right?
Conclusion
Now that you’ve mastered prepping and painting your wood, your project is ready to shine like a freshly polished gem. Remember, patience is your best friend—thin, even coats and proper drying time make all the difference.
With these steps under your belt, you’re not just painting wood; you’re transforming it. Spray painting wood can totally change the look and feel of your project, making it stand out beautifully.
So grab that spray can confidently, and let your creativity take flight. Your masterpiece awaits, and with the right technique, your wood will look amazing and last longer.