How to Clean Graco Paint Sprayer in 5 Easy Steps
To clean your Graco paint sprayer in five easy steps, start by priming the sprayer with water. This helps flush out any leftover paint from the hose and prevents clogs. It’s a simple but crucial first step to keep your sprayer in top shape.
Next, remove the spray tips and flush the lines thoroughly. Don’t forget to scrub off any dried paint, which can cause problems later on. Taking your time here ensures everything flows smoothly next time you use it.
Then, drain any leftover paint from the sprayer and flush the pump several times with clean water. This helps clear out any paint residue inside the pump itself.
If you’re planning to store your sprayer for a while, apply pump armor to protect the equipment from wear and rust.
Finally, always wear safety gear while cleaning and double-check that all parts are clean and tightly secured. Keeping your Graco paint sprayer well-maintained will make your painting projects easier and keep your equipment lasting longer.
Keep reading for detailed tips on achieving a flawless clean!
Key Takeaways
– Prime the sprayer with water by rinsing the suction hose and pumping until water runs clear.
This helps clear out any leftover paint and gets your sprayer ready for cleaning.
– Flush paint lines and spray components thoroughly. Remove the spray tip and guard for a more thorough clean.
It’s important to get all those little parts spotless to avoid clogs later on.
– Drain leftover paint and flush the pump with clean water. Use multiple buckets to make sure you rinse everything completely.
Taking your time here prevents paint buildup and keeps your sprayer working smoothly.
– Apply pump armor, either diluted or undiluted, depending on how long you plan to store the sprayer.
This step protects the pump from damage during storage, so it stays in good shape.
– Perform safety checks, reassemble all parts securely, and store the sprayer in a dry, safe place.
Doing this ensures your sprayer is ready to use next time without any issues.
Prepare and Prime the Sprayer With Water
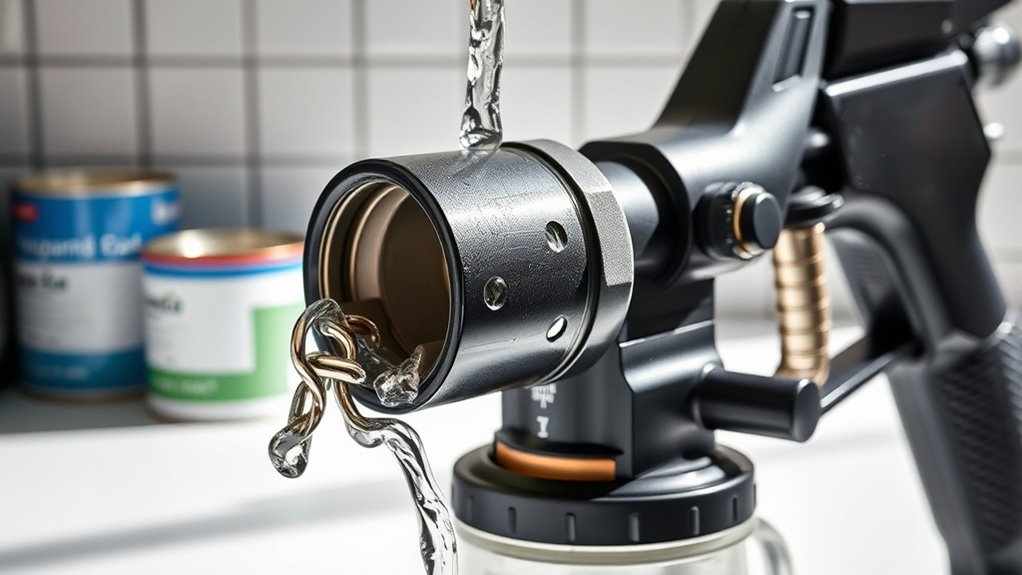
Before you begin cleaning, make sure the sprayer is in prime position with no pressure on the gun. Start by preparing two buckets of water: one for rinsing the suction hose and another for cleaning the system.
Ensure the sprayer is primed and pressure-free, then prepare two buckets for rinsing and cleaning.
Dunk the suction hose into the first bucket and remove any excess paint using a rag or your fingers. Next, prime the sprayer by pumping water through it until the paint changes from thick to a watery consistency. This shift means the sprayer is properly primed.
Keep an eye on the flow and stop pumping as soon as the water runs clear. Finally, switch the machine to spray mode and carefully remove the drain tube.
Following these steps ensures your sprayer is correctly prepared and primed for the cleaning process. Easy, right? Just take it step by step, and you’ll be good to go!
Flush Paint Lines and Clean Spray Components

Once you’ve primed the sprayer and verified the water runs clear, it’s time to flush the paint lines and clean the spray components. Start by switching the sprayer to spray mode and increasing the pressure to recover any leftover paint into the drum.
Next, remove the spray tip and guard. Flush both thoroughly in both directions with water to clear out residual paint. Use a soft brush to scrub them carefully, ensuring all dried paint is removed for *ideal* spray performance.
Don’t forget to screw back on the extension and CleanShot components, rinsing them thoroughly to remove paint traces. Keep flushing the entire system with fresh water, switching buckets as needed, until the water runs clear. That way, you’ll know all paint has been eliminated from the lines and parts.
Drain Paint and Perform Thorough Pump Flushing

How do you guarantee every drop of paint is cleared from your Graco sprayer? Start by draining any leftover paint from the pump back into the paint container.
Begin by draining leftover paint from your Graco sprayer back into the paint container.
Then, connect the pump to clean water and flush out residual paint until the water runs clear. Follow these steps to ensure a thorough pump flush:
- Drain the paint completely from the system before cleaning.
- Run clean water through the pump to loosen paint residues.
- Use multiple buckets of fresh water for rinsing.
- Prime the pump with water to dislodge stubborn paint inside.
- Continue flushing until the water exiting is free of paint.
This thorough draining and flushing process prevents clogs and keeps your sprayer ready for its next use.
It’s a simple routine that really makes a difference!
Apply Pump Armor for Storage Protection
After flushing your Graco sprayer with clean water, protect its internal parts by applying pump armor. For short-term storage of 1 to 3 days, mix pump armor with water at a 1:10 ratio. This diluted solution helps prevent corrosion inside the pump.
If you plan to store your sprayer longer, prime the pump with undiluted pump armor directly into the system. Make sure the diluted mixture has a light medium blue color before priming.
During priming, watch the fluid exiting the drain tube; consistent color signals proper coverage. Once primed, switch the sprayer to spray mode, carefully remove the drain tube, and store the sprayer in a safe, dry place.
Using pump armor ensures your equipment stays protected and ready for the next use. It’s a simple step that really helps keep your sprayer in great shape!
Ensure Safe Handling and Final Equipment Checks
While cleaning your Graco paint sprayer, always wear safety goggles and gloves to protect yourself from splashes and paint fumes. Prioritize safety by turning off the sprayer and unplugging it before starting any cleaning.
Always wear safety goggles and gloves, and unplug your Graco sprayer before cleaning to protect yourself.
After cleaning, inspect every part carefully. Here’s a quick checklist to ensure safe handling and final equipment checks:
- Disconnect from the power source to avoid accidental activation.
- Check all components for leftover paint or debris; clean thoroughly.
- Verify the spray tip and guard are clear of clogs and dried paint.
- Reassemble all parts securely to maintain sprayer integrity.
- Store the sprayer in a dry, safe location to prevent damage.
Following these steps ensures your Graco sprayer stays in top condition and guarantees your safety.
Frequently Asked Questions
How to Properly Clean a Graco Paint Sprayer?
You should unplug your Graco sprayer and release the pressure first. Then, flush it with water to clear out any remaining paint.
Next, remove the tips and give them a good scrub. Don’t forget to clean the pump thoroughly as well.
Once everything’s clean, reassemble your sprayer. If you’re planning to store it, apply some pump armor.
Finally, keep your sprayer in a clean, dry place. This helps ensure it stays in great condition for the next use.
Can I Run Water Through My Paint Sprayer to Clean It?
Yes, you can run water through your paint sprayer to clean it, to flush out paint, to prevent clogs, and to maintain performance.
Just switch to water spray mode and follow your model’s instructions carefully. It’s a simple step but really important to keep your sprayer working smoothly.
What Do I Run Through My Paint Sprayer to Clean It?
You run clean water or a compatible cleaning solution through your Graco paint sprayer. This flushes out residual paint, ensuring the hose, tip, and pump stay clear.
That way, your sprayer works smoothly for your next project. It’s a simple step but really important to keep everything in good shape.
How to Clean Graco Paint Sprayer With Buckets?
You rinse the suction hose in one bucket, then prime water through the pump until it’s watery.
Switch to spray mode, flush with clean water from the second bucket, and repeat until the water runs clear.
It’s pretty straightforward once you get the hang of it! Just keep cycling the water through until there’s no paint left.
Conclusion
Cleaning your Graco paint sprayer properly not only extends its life but also saves you time and money—did you know that 70% of sprayer malfunctions come from poor cleaning?
By following these five simple steps, you’ll avoid costly repairs and keep your equipment running smoothly for years. Taking just a few extra minutes now guarantees your sprayer stays ready for the next job.
Keeping your Graco paint sprayer clean is key to maintaining its performance and durability. Regular cleaning prevents clogs and ensures even paint flow, making your painting projects quicker and less frustrating. So, invest a little time in cleaning your Graco paint sprayer, and you’ll enjoy smooth, efficient spraying every time. Your future self (and your wallet) will thank you!