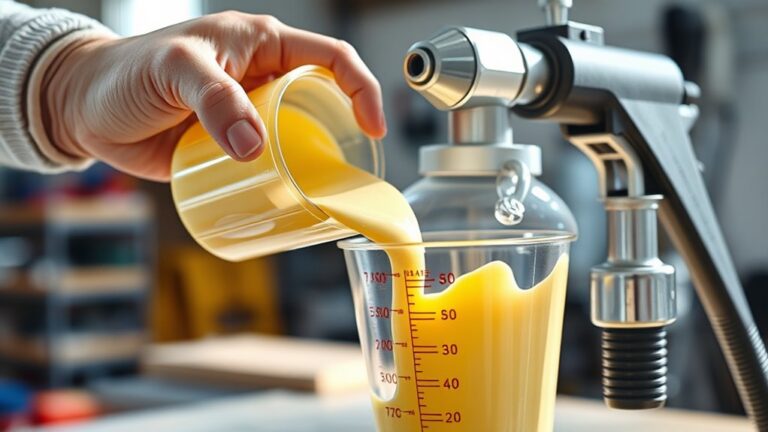
How to Thin Paint for an Airless Sprayer in 7 Easy Steps
To thin paint for an airless sprayer, first gather clean containers, strainers, and measuring tools. Stir your paint well to get it nice and smooth, then strain it to remove any lumps that could clog your sprayer.
Choose the right thinner—water works great for latex paints, while oil-based paints need a recommended solvent. Add the thinner gradually, mixing thoroughly as you go to get the perfect consistency.
Next, test your mix by spraying on scrap material. This helps you see if the paint flows smoothly and covers evenly.
Adjust the thinning if needed to avoid drips or uneven patches.
Following these simple steps guarantees a clog-free spray and professional-looking results. Keep going to uncover expert tips that will make your airless spraying job even easier and more effective!
Key Takeaways
- Stir paint thoroughly for 2-3 minutes to ensure even pigment distribution before thinning. This helps get everything mixed well.
- Strain paint through a fine mesh to remove lumps and debris, preventing sprayer clogs. It’s a simple step but really makes a difference.
- Use clean, cold water to thin latex paint, adding gradually about 10-15% of total volume. Go slow here to avoid over-thinning.
- Mix thinner in with an up-and-down motion, then let the paint sit 10-15 minutes to blend. This gives the paint time to absorb the thinner evenly.
- Test spray on a scrap surface and adjust thinning ratio for optimal spray pattern and consistency. Keep tweaking until it sprays just right!
Gather Necessary Supplies and Equipment

Before you begin thinning paint for your airless sprayer, gather all the necessary supplies and equipment to guarantee a smooth process. Start by collecting clean containers or buckets to transfer and mix the paint.
Use high-quality strainers to filter out lumps and debris. This helps ensure a smooth finish when spraying.
Accurate measuring tools, like cups or a scale, are essential to add the right amount of water based on the paint volume. Make sure the water you use for thinning is clean and cold, preferably distilled or tap water.
Don’t forget safety gear such as gloves and masks to protect yourself from spills and fumes. Having all these supplies ready helps you work efficiently and achieve the best results with your airless sprayer.
Stir and Prepare the Paint

Once you’ve gathered your supplies, stir the paint thoroughly to evenly distribute pigments and additives, ensuring consistent viscosity throughout. Use a clean mixing stick or paddle and stir the paint in its can for at least 2-3 minutes.
To prepare the paint for thinning and spraying, transfer it to a separate, clean container. This step helps prevent contamination and makes mixing easier.
After stirring, avoid rushing the process. Let the paint sit for about 10-15 minutes to allow any trapped air bubbles to escape.
This way, you’ll get a smooth finish when spraying. By taking time to stir and prepare the paint properly, you set yourself up for a successful airless spraying experience without clogs or uneven coverage.
Strain the Paint to Remove Impurities

You’ll want to strain your paint using a fine mesh strainer to catch lumps and debris before spraying. This step is essential to prevent clogs and damage to your sprayer’s tip.
Using the right materials and straining slowly ensures a smooth, reliable spray every time. It’s a simple step that really pays off!
Importance of Straining
Why should you strain paint before using an airless sprayer? Straining removes lumps, dried skin, and debris that can clog the spray nozzle. This ensures a smooth spraying process.
Using a fine mesh filter or paint strainer bag helps the paint pass through evenly. It prevents uneven spray patterns caused by solid particles or clumps.
Always strain your paint into a clean container before thinning or pouring it into the sprayer. This way, you catch impurities early.
If the paint thickens or you notice clogs during spraying, just re-strain it to keep the flow consistent. Proper straining protects your equipment and guarantees a flawless finish.
Straining Materials Used
Although straining paint may seem like a simple step, choosing the right materials makes a big difference in removing lumps and debris effectively. To catch impurities before thinning, use a fine mesh paint strainer or filter designed specifically for this purpose.
Here’s what you need to know:
- Use a clean paint strainer or filter over a separate container to catch solid particles.
- Pour paint slowly through the filter to avoid pushing debris through.
- Replace or clean the strainer regularly during your work to maintain a smooth flow.
Straining your paint ensures impurities won’t clog your sprayer or cause uneven spray patterns. Always strain paint into a clean bucket before adding any thinning agents, keeping your mixture pure and ready for a flawless finish.
Preventing Sprayer Clogs
Since even small debris can cause major issues, straining paint thoroughly before filling your sprayer is essential to prevent clogs. After thinning, always pour paint through a quality strainer, like a fine mesh filter or a paint strainer basket, to remove lumps and dried particles.
This step guarantees solids don’t block the spray tip, maintaining a smooth application. Remember to check and clean the strainer regularly during your project to avoid buildup that leads to clogging.
| Strainer Type | Benefit |
|---|---|
| Fine Mesh Filter | Removes small debris |
| Paint Strainer Basket | Ensures consistent filtering |
| Durable Strainer | Reduces spray tip blockages |
Proper straining after thinning is your best defense against sprayer clogs. So, take the time to strain well—it really pays off!
Choose the Appropriate Thinning Agent
When preparing paint for an airless sprayer, you need to select the right thinning agent to guarantee smooth application and proper flow. Choosing the wrong thinner can cause clogs or uneven coverage.
Here’s what to consider:
- Use water as the thinning agent for water-based latex paints. Always opt for distilled or deionized water to avoid minerals that affect consistency.
- Avoid solvents like paint thinner on latex; they can cause curdling or poor flow.
- For oil-based paints, rely on manufacturer-recommended thinners such as turpentine or white spirit instead of water.
Selecting the appropriate thinning agent ensures your paint sprays evenly and prevents damage to your equipment. So, it’s definitely worth taking the time to pick the right one!
Add Thinner Gradually and Mix Thoroughly
To get the best results, add thinner gradually to your paint, starting with about 10-15% of the total volume. Pour small amounts of thinner into the paint, then mix thoroughly using a stirring stick or paddle.
Begin by adding 10-15% thinner gradually, stirring thoroughly for optimal paint consistency.
Stir in an up-and-down motion to avoid bubbles and guarantee an even blend. After mixing, let the paint sit for 10-15 minutes so the ingredients fully integrate.
This step helps achieve a consistent viscosity. Once blended, check the spray pattern to see if it flows smoothly.
If needed, add more thinner in small increments, always mixing thoroughly after each addition. Taking your time with this process ensures ideal spray performance and prevents clogs or uneven application when using your airless sprayer.
Test the Paint Consistency With a Spray Sample
Before spraying your main surface, always test the thinned paint on scrap drywall or cardboard to guarantee the consistency is right. Using a spray sample helps you evaluate the paint consistency and ensures your project turns out smooth and even.
To effectively test spray pattern and paint consistency:
- Hold the spray gun 12-18 inches from the test surface for a consistent spray sample.
- Observe the spray for even coverage, smoothness, and no sputtering or globbing.
- Check the paint’s drip rate with a stick; a slow, steady drip signals proper viscosity.
This simple test prevents problems like overspray or dribbling before you commit to the main job.
Trust me, taking this quick step saves you from headaches later on!
Adjust Thinning Ratio Based on Spray Performance
Although you may start with a standard thinning ratio like 70/30 for emulsion paints, you’ll need to modify it based on how the paint sprays. Watch the spray performance closely—if the fan is uneven or the paint sputters, increase thinning by 5-10% increments until it smooths out.
Test spray on cardboard to check coverage; if you notice drips or splatters, thin the paint further. For oil-based paints, stick to the manufacturer’s recommended ratio (usually 3 parts paint to 1 part thinner) but be ready to adjust if clogging happens.
During spraying, if the pattern narrows or sputtering starts, add small amounts of water or thinner to maintain consistent spray performance. Adjusting the thinning ratio ensures a smooth, even finish every time.
Frequently Asked Questions
How to Dilute Paint for Airless Sprayer?
You dilute paint by gradually adding the appropriate thinner—water for water-based or solvent for oil-based—mixing thoroughly.
Strain it, then test spray on scrap material, adjusting the thickness until it sprays smoothly without sputtering.
It’s all about getting that perfect consistency so your airless sprayer works like a charm!
What Is the Number One Rule When Using an Airless Spray Gun?
First and foremost, you’ve got to keep the paint viscosity just right—don’t rock the boat by over-thinning.
It guarantees smooth spraying, prevents clogs, and gives your project a flawless finish every single time.
Can Paint Be Too Thick for an Airless Sprayer?
Yes, paint can be too thick for an airless sprayer. If it clogs the tip or sprays unevenly, you’ll need to thin it properly.
This helps guarantee a smooth flow and avoids damaging your equipment or ruining the finish. So, always check the paint consistency before you start spraying.
Can You Use Acrylic Paint in a Spray Gun Without Thinning?
If you’re using a high-quality acrylic with low viscosity, like a professional artist did last month, you can spray without thinning.
But usually, you’ll need to thin it to avoid clogs and get a smooth finish.
It’s all about making sure the paint flows well through your spray gun.
Otherwise, you might end up with a messy or uneven coat.
Conclusion
Now that you know how to thin paint for an airless sprayer, you’re set to achieve a smooth, professional finish every time.
Did you know that properly thinned paint can reduce overspray by up to 30%? That means less mess and more efficient coverage.
Just remember to add thinner gradually and test frequently. This way, your spray job looks flawless without wasting materials or time.
Thinning paint correctly is key to getting the best results from your airless sprayer. It helps improve flow, prevents clogging, and ensures even application.
So, take your time, follow these steps, and enjoy a hassle-free painting experience. Happy spraying!