7 Tips for Using a Paint Sprayer Inside Safely
When using a paint sprayer indoors, it’s important to prioritize safety and proper technique to get the best results. Ventilate the area well to avoid harmful fumes, and always wear protective gear like gloves and goggles. This helps keep you safe while ensuring the paint job looks professional.
Before you start, prepare your surfaces carefully by cleaning and masking them to protect floors and fixtures. Choosing a low-pressure sprayer designed specifically for indoor use makes a big difference.
Keep your spraying technique steady to achieve even coverage without drips or patches.
Don’t forget about electrical safety—unplug devices and clear any trip hazards in your workspace. Once you’re done, clean your equipment immediately to keep it in good shape for the next project.
Following these tips will help you get a smooth, safe, and professional finish every time.
Key Takeaways
- Ensure proper ventilation by opening windows and using exhaust fans to reduce harmful fumes during indoor spraying. This helps keep the air fresh and safer to breathe.
- Wear appropriate PPE, including respirators, chemical-resistant gloves, and safety goggles. These protect you from inhaling fumes and from any accidental skin contact.
- Thoroughly mask and cover floors, furniture, and adjacent areas with painter’s tape and plastic sheeting. This step prevents any overspray damage and keeps your space clean.
- Use a low-pressure HVLP sprayer with adjustable patterns for controlled application. It helps minimize indoor overspray and gives you better control.
- Maintain steady, smooth spraying motions at a consistent distance of 10-12 inches. This technique ensures even coverage and helps avoid drips.
Ensure Proper Ventilation in the Painting Area

Although it might be tempting to start painting right away, you should first guarantee the area is well-ventilated by opening windows and doors to promote airflow and reduce harmful VOC buildup.
Proper ventilation is key to maintaining good air quality while you work. Use exhaust fans or a dedicated ventilation system to draw out fumes, creating negative pressure that pushes indoor air outside.
This continuous supply of fresh air prevents the concentration of paint vapors and overspray in your workspace. Avoid painting in confined spaces where airflow is limited, as this can lead to health risks.
Wear Appropriate Protective Gear

Wearing the right protective gear is vital whenever you use a paint sprayer indoors to guard against harmful fumes, overspray, and skin contact. To guarantee your personal protection, always equip yourself with proper safety equipment that complements your workspace ventilation.
Proper protective gear is essential when using a paint sprayer indoors to prevent exposure to fumes and overspray.
Don’t skip these key items:
- A respirator with organic vapor cartridges or a powered air-purifying respirator (PAPR) to block inhalation of paint fumes and mist
- Chemical-resistant gloves and long-sleeved clothing to protect your skin from paint and solvents
- Safety goggles or a full-face shield to shield your eyes and face from overspray and splashes
Following the manufacturer’s guidelines for personal protective equipment is indispensable. Combining adequate ventilation with the correct protective gear drastically reduces health risks during indoor painting projects.
Prepare and Mask Surfaces Thoroughly

Protecting yourself with the right gear is just one part of staying safe when using a paint sprayer indoors. Before you start, thoroughly clean all surfaces with TSP and water to remove grease, dust, and cobwebs.
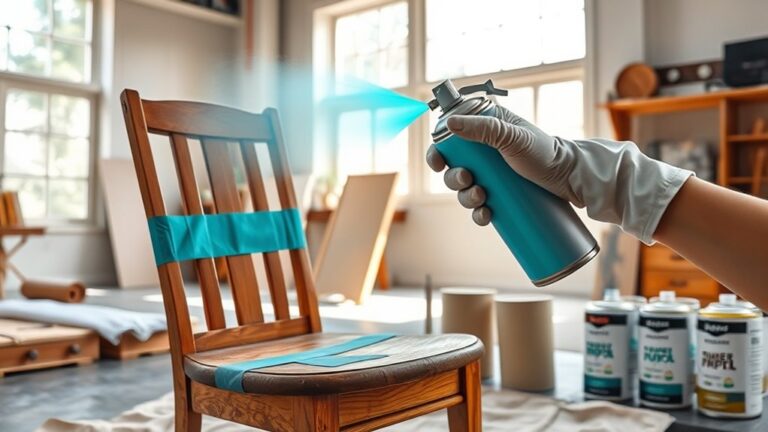
Remove electrical covers, fixtures, and loose items to shield them from overspray. Use painter’s tape to mask edges around trim, windows, and door frames, pressing firmly to prevent paint seepage.
Cover floors, furniture, and any non-painted surfaces with plastic sheeting or masking paper to catch overspray effectively. Don’t forget to mask large areas beyond your project, like ceilings and adjacent rooms, with plastic sheeting and tape for maximum protection.
Proper masking guarantees a clean job and prevents damage to surfaces you want to keep paint-free. It’s definitely worth the extra effort!
Choose the Right Paint Sprayer for Indoor Use
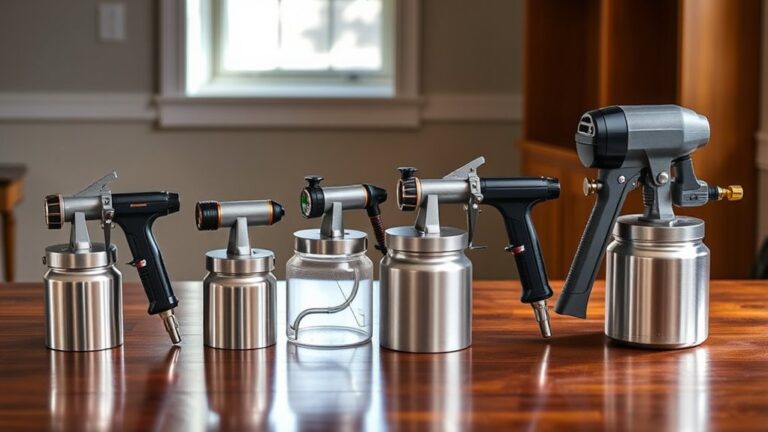
When you choose a paint sprayer for indoor use, pick a low-pressure HVLP model designed to minimize overspray and give you better control. Unlike an Airless Paint Sprayer, HVLP units offer adjustable settings and spray tips that help you tailor the spray pattern for precise application in tight spaces.
Select a sprayer with built-in filtration to prevent clogging and ensure smooth finishes. Also, opt for one compatible with water-based or low-VOC paints to maintain indoor air quality.
Consider these features when selecting your paint sprayer:
- Ergonomic design with adjustable spray patterns for comfortable, controlled use
- Fine finish nozzles to achieve detailed results without excess overspray
- Compatibility with low-VOC paints to keep your workspace safe and breathable
This way, you’ll get the job done neatly and safely indoors. It’s all about having the right tool that fits your space and paint type!
Maintain Consistent Spraying Technique
To achieve a smooth, professional finish indoors, you need to maintain a consistent spraying technique throughout your project. Keep the spray gun at a steady distance of 10-12 inches to ensure even coverage and prevent runs.
Use smooth, continuous arm movements, triggering the sprayer only while moving to avoid pattern inconsistencies. Maintain about 50% overlap on each pass, adjusting your spray pattern as needed for uniform application.
| Technique Aspect | Recommended Practice | Reason |
|---|---|---|
| Distance | 10-12 inches | Prevents runs, ensures coverage |
| Overlap | ~50% | Avoids streaks, uniform paint |
| Spray Pattern | Check and adjust regularly | Maintains finish consistency |
| Arm Movements | Smooth, continuous | Prevents inconsistencies |
| Trigger Usage | Only while moving gun | Ensures even application |
Manage Electrical and Trip Hazards
Before you start spraying, make sure all electrical wiring is properly secured and outlets are safe to use.
Keep your walkways clear by organizing cords and removing any obstacles that could cause you to trip.
Staying mindful of these hazards will help you work safely and avoid accidents.
Secure Electrical Wiring
Although paint sprayers offer convenience, you’ve got to secure electrical wiring to prevent accidents and damage. Before you start, turn off and unplug all electrical devices to avoid contact with paint or equipment.
Protect electrical outlets and switches with plastic covers or painter’s tape to keep overspray at bay. If you encounter exposed electrical wiring, cover it securely with electrical tape or plastic sheeting.
Also, ensure electrical circuits near your workspace are switched off at the breaker box for maximum electrical safety.
- Use electrical tape to shield exposed wiring from paint and moisture.
- Cover electrical outlets and switches to prevent overspray damage.
- Turn off electrical circuits in the work area to eliminate hazards.
Clear Walkways and Cords
How can you prevent accidents while using a paint sprayer indoors? Start by keeping walkways clear and cords well organized. Loose cords and extension cords can easily become trip hazards, so secure them with clips or ties along walls or ceilings to keep them off the floor.
Remove furniture and clutter from the spraying area to maintain clear, unobstructed pathways. It’s also a good idea to place warning signs or barriers near cords and equipment to alert others of potential hazards.
Don’t forget to regularly inspect all cords for damage or fraying, and replace any worn ones to maintain electrical safety. By prioritizing cord organization and clear walkways, you’ll considerably reduce the risk of trips and electrical accidents, making your painting project safer and more efficient.
Clean and Store Equipment Immediately After Use
To keep your paint sprayer working smoothly, you should rinse it thoroughly with water or the recommended solvent right after use. This helps prevent paint from drying inside and causing clogs.
Then, take apart the spray tips, filters, and manifolds to clean each part with a brush and the proper solution. Wipe down all plastic and metal components with a clean cloth using paint thinner or water before putting everything back together.
Remember to clean all parts thoroughly to avoid buildup. Also, store your equipment in a dry, dust-free place.
Perform regular maintenance to extend its lifespan. Proper cleaning and storage not only prevent damage and corrosion but also make sure your paint sprayer is ready for your next project.
Don’t skip these steps—they’re essential for preserving your equipment’s performance.
Frequently Asked Questions
Is It Safe to Use a Paint Sprayer Indoors?
Yes, you can safely use a paint sprayer indoors if you guarantee proper ventilation, wear suitable respirators, seal off sensitive areas, protect your workspace, and follow manufacturer guidelines to control fumes and prevent overspray contamination.
Just make sure the room is well-ventilated. Open windows and use fans to keep fresh air moving around.
Also, don’t forget to wear a good respirator to avoid breathing in harmful fumes. Sealing off sensitive areas helps keep paint where it belongs.
Protect your floors and furniture too. And always stick to the manufacturer’s instructions to keep everything safe and clean.
What Is the Number One Rule When Using an Airless Spray Gun?
The number one rule when using an airless spray gun is to never point it at yourself or others. Always handle it carefully to avoid high-pressure injection injuries.
And make sure you’re wearing proper protective gear every time. Safety first, right? It’s just as important as getting the job done well.
What Are the Most Common Mistakes When Using Spray Paint?
You often apply too much paint in one pass and fail to mask surfaces properly. Holding the sprayer at the wrong distances or angles is another common mistake.
People also tend to neglect cleaning the sprayer thoroughly. Plus, overlapping passes by less than 50% can cause drips, overspray, and uneven coverage.
Do You Need a Mask When Spray Painting Inside?
Yes, you definitely need a mask when spray painting inside. It safeguards you from inhaling harmful fumes and tiny paint particles, reducing health risks.
Always use a proper respirator to ensure your safety in enclosed spaces. It’s just a smart move to protect your lungs while you work.
Conclusion
By following these tips, you’ll turn your indoor painting project into a breeze instead of a nightmare. Don’t forget, proper ventilation and protective gear aren’t just suggestions—they’re lifesavers.
Mask surfaces carefully and pick the right sprayer to avoid any mess that could feel like a disaster of epic proportions. Keep your technique steady, watch for hazards, and clean your gear right away.
With these safety tips for using a paint sprayer inside, you’ll enjoy a smooth, hassle-free experience. Prioritizing ventilation, wearing protective gear, and preparing your space properly ensures your project goes off without a hitch. Plus, mastering your technique and maintaining your equipment means a flawless finish every time. Embrace these habits, and your indoor painting jobs will be safer, cleaner, and more satisfying.