How to Use a Paint Sprayer With an Air Compressor in 7 Easy Steps
To use a paint sprayer with an air compressor in seven easy steps, first gather your supplies and prepare the surface by cleaning and priming it. This step is crucial to ensure a smooth, even finish without imperfections.
Next, set up your compressor and connect the spray gun. Adjust the PSI between 15-30 for ideal airflow—it helps you get that perfect spray pattern.
Test the spray on scrap material to check the pattern and make any needed tweaks.
Then, apply paint using smooth, overlapping strokes at about 6-8 inches away from the surface. This technique helps avoid drips and uneven coverage.
Finally, clean and maintain your equipment thoroughly to keep everything working well for your next project.
Stick around for tips on mastering a flawless finish with your paint sprayer and air compressor!
Key Takeaways
- Connect the paint sprayer securely to the air compressor. Adjust the compressor pressure to 15-30 PSI for optimal spray performance.
- Prepare the surface by cleaning, sanding, and applying primer. Don’t forget to mask surrounding areas to protect them from overspray.
- Test the spray pattern on scrap material from about 6-8 inches away. Adjust the nozzle or fluid control until you get a nice, even coverage.
- Use smooth, steady, overlapping strokes while keeping a consistent 6-8 inch distance. Make sure to hold the sprayer perpendicular to the surface for the best results.
- Clean the sprayer immediately after use with the appropriate solvent. Take apart any removable parts and store everything in a dry, dust-free area.
Gather Your Supplies and Tools

Before you start spraying, make sure you’ve gathered all the essential supplies and tools, such as a DeVilbiss spray gun, a Porter Cable air compressor, sandpaper, masking tape, and paint strainers.
Gather essential supplies like your spray gun, air compressor, sandpaper, masking tape, and paint strainers before starting.
Your paint supplies should include the correct type—oil-based, latex, or acrylic—and the right thinner to guarantee smooth spraying.
Prepare your workspace with drop cloths and masking materials to protect surfaces around you.
Check that your air compressor can deliver the required PSI, usually between 15 and 30 PSI, to operate the paint sprayer efficiently.
Finally, double-check that all your tools and paint supplies are clean and ready to use. Having everything prepared helps avoid clogs and assures a smooth, professional paint application.
Understand Different Types of Paint Sprayers

When selecting a paint sprayer, understanding the different types available helps you match the tool to your project’s needs.
HVLP sprayers use an air compressor to deliver paint at low air pressure. This reduces overspray and provides a smooth finish, which is ideal for detailed paint surfaces like furniture.
Airless sprayers, on the other hand, use high pressure without compressed air. They’re perfect for covering large surfaces quickly.
Electric sprayers combine features for portability, making them versatile for various tasks.
And cordless ones offer mobility without needing an air compressor, but keep in mind they usually have a smaller paint capacity.
| Sprayer Type | Best For |
|---|---|
| HVLP Sprayers | Detailed work, smooth finish |
| Airless Sprayers | Large surfaces, high coverage |
| Electric Sprayers | Portability, versatility |
| Cordless Sprayers | Mobility, small projects |
Prepare the Surface and Paint

Knowing which paint sprayer fits your project sets the stage for achieving a flawless finish, but preparing the surface properly guarantees that paint adheres well and lasts.
First, thoroughly clean and sand the surface to remove dust, grease, and old paint residues. This step ensures smooth adhesion. Next, wipe the area with a tack cloth or damp rag to eliminate any remaining debris.
Apply a primer suited for your material—shellac primer works great for bare wood or tricky spots—and let it dry completely. Once dry, lightly sand the primed surface to promote better paint adhesion and a smooth finish.
Finally, protect surrounding areas with masking tape, kraft paper, or drop cloths to avoid overspray. Taking these steps helps you prepare effectively for a lasting, professional-looking paint job.
Set Up the Air Compressor and Spray Gun
Start by securely connecting your spray gun to the air compressor with a quality air hose to avoid leaks.
Next, adjust the compressor’s pressure to the recommended PSI for your project, usually between 15-30 PSI.
Make sure to check airflow and install a moisture trap to keep water out of your paint.
This step really helps ensure a smooth, clean finish.
Connect Equipment Securely
Although setting up the air compressor and spray gun might seem straightforward, securing all connections properly is vital to prevent leaks and guarantee consistent airflow. First, connect equipment securely by attaching a kink-free air hose from the air compressor to the spray gun.
Make sure all fittings are tight, especially the spray gun’s air inlet, to maintain steady pressure. Check that the moisture trap or water separator is empty and working, as water can ruin your paint finish.
Once everything’s connected, turn on the air compressor and watch the pressure gauge to verify it holds steady. Taking these steps ensures your setup runs smoothly and your paint job comes out flawless without interruptions caused by air leaks or inconsistent flow.
Adjust Compressor Pressure
After connecting your equipment securely, you’ll want to set the air compressor’s pressure regulator to the recommended PSI, usually between 15 and 30 for most paint spraying tasks. Turn on the compressor and slowly increase the pressure, watching the gauge until you reach the desired PSI.
Use the pressure regulator knob to fine-tune and maintain consistent airflow, which is vital for an even spray pattern. Next, press the spray gun trigger briefly to check the spray pattern; it should be steady and uniform without sputtering.
If the pattern seems off, adjust the pressure regulator slightly until you achieve a smooth, consistent flow. Properly setting the PSI and airflow ensures better coverage and helps avoid paint runs or uneven application.
Check Airflow and Moisture
How can you guarantee your paint sprayer delivers a smooth, even coat? Start by checking the airflow and moisture in your setup.
First, connect the spray gun securely to the air compressor’s hose. Make sure all connections are tight to avoid leaks.
Attach a moisture trap inline with the air hose. This will catch any water that could compromise the paint finish.
Turn on the air compressor and keep an eye on the pressure gauge. Adjust the regulator valve until you get a steady airflow that matches the spray gun’s recommended PSI.
Also, inspect the air hose for kinks or blockages. These can restrict airflow and mess with your spray performance.
Test and Adjust the Spray Pattern
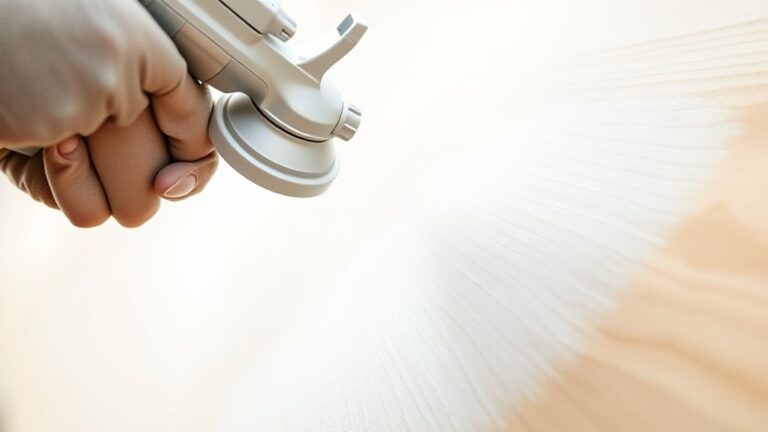
Before you start painting, always test the spray pattern on a scrap piece to verify even coverage. Hold the sprayer at a consistent distance of 6-8 inches from the surface and spray using overlapping strokes.
This helps you observe if the paint distributes uniformly without drips or gaps. If you notice uneven streaks or patches, adjust the nozzle or fluid control valve to refine the spray width and flow.
Keep testing until the pattern is smooth and consistent. Maintaining this consistent distance and adjusting settings carefully guarantees your paint job will be even and professional-looking.
Taking the time to test the spray pattern thoroughly prevents costly mistakes on your actual project surface. So, don’t rush this step—it really pays off!
Apply Paint With Proper Technique
Keep your spray gun about 6-8 inches from the surface and hold it perpendicular for even coverage. Use smooth, steady strokes, overlapping each pass to avoid streaks and missed spots.
This technique helps you achieve a consistent, professional finish every time. Just take your time and keep your movements controlled—it really makes a difference!
Maintain Consistent Distance
Although it might seem simple, maintaining a consistent distance of 6 to 8 inches between the spray nozzle and your surface is essential for even coverage. You need to hold a steady distance to achieve a uniform spray pattern, preventing paint from pooling or fading.
Keep the spray gun perpendicular to the surface to avoid uneven layers. Regularly check your distance and adjust as necessary to maintain consistent application throughout your project.
Use Smooth Strokes
Maintaining a steady distance sets the stage, but the way you move the spray gun makes all the difference in your paint’s finish. Use smooth, consistent strokes, keeping the gun moving steadily to make certain even coverage without streaks or drips.
Start each stroke just before the surface edge and finish slightly beyond it for seamless layers. Avoid pausing mid-stroke to prevent uneven thickness. Practicing on scrap material helps you master the right speed and motion.
| Technique Aspect | Key Tip |
|---|---|
| Stroke Movement | Use smooth, overlapping strokes |
| Distance Consistency | Maintain 6-8 inches from surface |
| Start & End Points | Begin before & extend beyond edges |
Following this method guarantees a professional, uniform paint job. You’ll get the hang of it in no time!
Overlap Spray Patterns
When you overlap your spray patterns by about 50%, you guarantee even coverage and cut down on streaks or missed spots. To achieve this, hold your spray gun 6-8 inches from the surface, maintaining a consistent overlap with each pass.
Avoid back-and-forth motions; instead, use smooth, overlapping strokes to create a seamless finish. Adjust the spray gun’s speed so every pass slightly covers the previous one without causing paint buildup.
Your air compressor should provide steady pressure to support this technique. Before tackling your project, practice on scrap material to develop a steady hand and master consistent overlap.
Clean and Maintain Your Equipment
To keep your paint sprayer working smoothly, you should clean the spray gun, nozzle, and air cap with solvent or water right after each use to prevent paint buildup. Proper cleaning is key to avoiding clogs that can disrupt your spray pattern.
Use compressed air to blow out any residual paint from hoses and the spray gun for clear airflow. Regular maintenance includes checking and replacing worn seals, gaskets, and filters to keep your equipment performing at its best.
At the end of each project, disassemble and thoroughly clean all removable parts to prevent corrosion and clogs. Finally, store your sprayer in a dry, dust-free spot and apply a light lubricant to moving parts to ensure smooth operation and extend the life of your paint sprayer.
Frequently Asked Questions
Can I Use a Paint Sprayer With My Air Compressor?
Yes, you can use a paint sprayer with your air compressor if it meets the required pressure and airflow.
Just double-check your compressor’s specs to verify it matches your sprayer’s needs for smooth, even painting.
That way, you’ll avoid any unexpected hiccups and get a nice, professional finish every time.
How Do You Use a Paint Sprayer for Beginners?
Did you know 90% of beginners improve their finish by practicing first?
Start by thinning your paint, hold the sprayer 6-8 inches away, move in smooth strokes, and keep the gun steady for even coverage.
It really helps to keep a consistent speed and distance. Just take your time and don’t rush—practice makes perfect!
How Big of an Air Compressor Do I Need to Run a Paint Sprayer?
You’ll need an air compressor that delivers at least 4 to 6 CFM at 40 PSI for most paint sprayers.
Bigger projects might require 10 CFM or more, so always check your sprayer’s specs first. It’s important to match the compressor to what your sprayer needs to get the best results.
Do I Need to Dilute Paint for an Airless Sprayer?
Yes, you usually need to thin paint 10-20% for airless sprayers. This helps prevent clogs and guarantees a smooth flow.
Make sure to check your paint and sprayer instructions first. Also, strain the mixture and test it before you start spraying.
Conclusion
Now that you’ve mastered the dance between paint sprayer and air compressor, you’re ready to transform any surface into a smooth canvas. Like a painter wielding a magic wand, your steady hand and well-tuned equipment will breathe life into every stroke.
Remember, a little care in cleaning and maintenance keeps your tools humming like a well-oiled machine, ready for your next colorful masterpiece. Proper upkeep ensures your paint sprayer and air compressor deliver consistent performance every time you use them.
So, take a deep breath and let your creativity flow freely! Using a paint sprayer with an air compressor is an efficient way to achieve a flawless finish quickly. With these steps in mind, you’re all set to create stunning projects that showcase your skills and imagination.