How to Paint a Popcorn Ceiling With a Sprayer in 3 Easy Steps
To paint a popcorn ceiling with a sprayer, start by protecting your floors, furniture, and fixtures with drop cloths and painter’s tape. This step is key to avoiding any unwanted mess or paint splatters.
Next, use a sprayer to apply a light, even coat of water-based primer. Hold the sprayer about 12-18 inches from the ceiling to ensure good coverage without drips.
Once the primer dries, follow up with a latex ceiling paint for the best finish.
Finally, let the paint dry completely before removing all the coverings and cleaning up your workspace.
Keep reading for tips that’ll help you achieve smooth, lasting results with ease when painting popcorn ceilings with a sprayer!
Key Takeaways
- Prepare by covering floors and furniture, masking edges, and ensuring the ceiling is clean and dry before painting.
- Apply a light coat of water-based primer using a sprayer held 12-18 inches from the ceiling.
- Adjust sprayer flow on a test patch to prevent oversaturation and maintain popcorn texture.
- Spray latex ceiling paint evenly over the primed surface, allowing each coat to dry before applying the next.
- Remove protective coverings after 24 hours, clean tools thoroughly, and inspect for missed spots to touch up if needed.
Preparing and Protecting the Ceiling Area
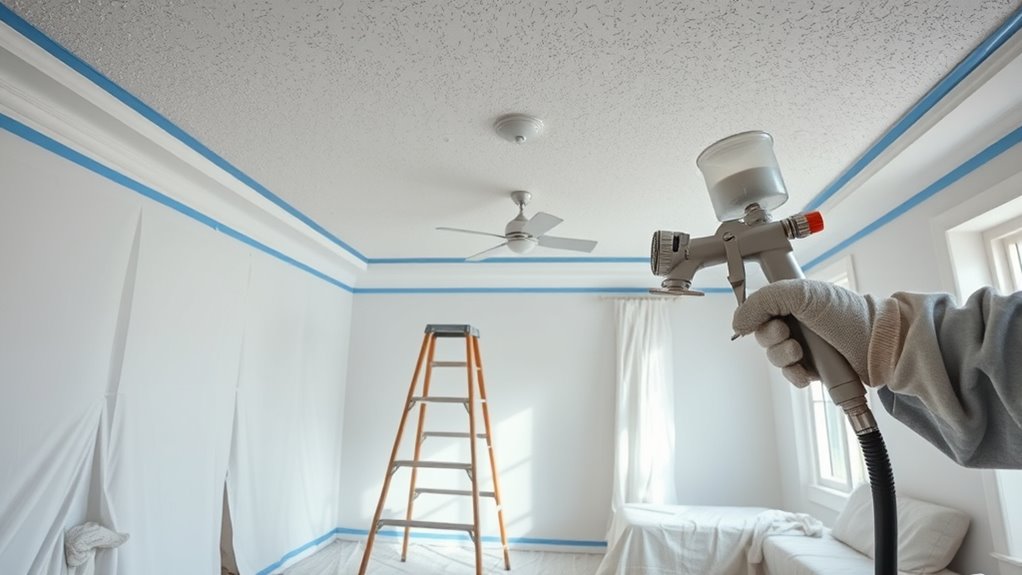
Before you start painting, make sure to cover your floors, furniture, and walls with plastic sheeting or drop cloths to protect them from overspray. Protecting the ceiling area also means using painter’s tape to mask off edges around vents, light fixtures, and trim for clean lines.
Remove or cover light fixtures and electrical outlet covers to avoid paint splatters. Before painting, guarantee the ceiling surface is clean, dry, and free of dust or cobwebs.
Taking these steps helps you avoid mess and ensures a smooth painting process. Proper preparation and protection make it easier to focus on the job without worrying about damage or cleanup later.
Your careful prep work sets the stage for a professional-looking finish. It really pays off to take the time upfront!
Applying Primer and Paint With a Sprayer

Once your ceiling is properly prepped and protected, you can move on to applying primer and paint with a sprayer. Start by choosing a water-based primer like Zinser 1-2-3 or Kilz, especially if your popcorn ceiling has stains or discoloration.
Attach a suitable nozzle to your sprayer and hold it 12-18 inches from the surface to ensure even coverage without damaging the texture. Spray a light, uniform coat of primer, allowing it to dry for 1-2 hours.
Hold the sprayer 12-18 inches away and apply a light, even coat of primer for best results.
For heavily stained or porous areas, apply a second light coat for better adhesion. After the primer dries completely, switch to a latex ceiling paint and apply it similarly, preserving the popcorn texture.
Always test spray on a small section first to adjust flow and avoid oversaturation. This way, you’ll get the best results without any surprises.
Finishing Touches and Cleanup

Although the paint may look dry to the touch, you should wait at least 24 hours before removing any painter’s tape or protective coverings. This helps guarantee the finish sets properly.
When you do remove the masking tape and plastic sheeting, peel them off carefully. You want to avoid damaging the fresh paint or disturbing the popcorn texture.
As part of the finishing touches, go ahead and reinstall any fixtures or light fittings you removed earlier.
Next, clean your sprayer thoroughly using water or the recommended cleaning supplies. This will prevent clogging and ensure it’s ready for your next project.
Finally, dispose of or store leftover paint and texture materials responsibly. Make sure to follow local regulations.
Proper texture removal and cleanup will keep your ceiling looking fresh and your tools in great condition.
Frequently Asked Questions
What Is the Easiest Way to Paint a Popcorn Ceiling?
The easiest way to paint a popcorn ceiling is by using a sprayer. You’ll get quick, even coverage without damaging the texture.
Plus, you won’t have to worry about tedious brushing or rolling, making your job much simpler. It really saves a lot of time and effort!
Can You Use a Paint Sprayer on Popcorn Ceilings?
Yes, you can use a paint sprayer on popcorn ceilings. Just make sure you adjust the pressure carefully and test a small area first to avoid damaging the texture.
Also, always protect surrounding surfaces from overspray. It’s better to be safe than sorry!
How Many Coats of Paint Should Be Put on a Popcorn Ceiling?
Think of painting your popcorn ceiling like dressing it in a cozy blanket—you’ll want to apply two coats.
This guarantees even coverage and hides texture, giving your ceiling a fresh, smooth look you’ll love.
How to Spray Popcorn Ceiling From a Spray Can?
You’ll shake the spray can well, hold it 12-18 inches from the ceiling, and spray with steady, overlapping strokes.
Apply light coats to avoid drips, letting each dry fully before adding more layers.
Take your time with each layer—it really helps get that even, textured look.
And remember, patience is key to a smooth finish!
Conclusion
Painting your popcorn ceiling with a sprayer is like giving your room a fresh breeze—lifting the old texture and inviting new light.
As you finish, you’re not just changing a surface; you’re renewing a space where memories will settle softly, just like the gentle spray you applied.
With each cleanup and final touch, you’re wrapping up a small transformation that brightens more than just the ceiling—it brightens your home’s soul.
Using a sprayer makes painting popcorn ceilings easier and faster, ensuring even coverage without damaging the texture. It’s a smart way to refresh your room and add value to your home. So, grab your sprayer and enjoy the process of painting your popcorn ceiling—it’s a simple project that brings big rewards in style and comfort.