How to Clean an Airless Paint Sprayer in 7 Easy Steps
To clean your airless paint sprayer in 7 easy steps, start by turning it off and depressurizing the system. This is important for your safety and to avoid any mess.
Next, remove any excess paint from the sprayer and wipe down the exterior to keep it tidy.
Now, flush the hoses and spray tips with the proper cleaning fluid. Make sure you use the right cleaner depending on whether you used water-based or oil-based paint.
Once flushed, pressurize the sprayer again and run the cleaning fluid through the entire system to clear out any remaining residue.
After that, carefully clean and inspect the filters and accessories. These parts can get clogged or damaged, so it’s important to check them regularly.
Finally, store your sprayer in a suitable environment—dry and protected from extreme temperatures—to prevent damage and keep it ready for your next project.
Keep reading to discover detailed tips that guarantee your sprayer stays in top shape and lasts for many jobs to come!
Key Takeaways
- Turn off, unplug, and release pressure by activating the spray gun and opening the pressure control valve before cleaning. This step is crucial for safety and to avoid any unexpected sprays.
- Remove and clean the spray tip, filter, and hose using appropriate cleaning solutions for the paint type. Make sure you choose the right cleaner—water for latex paint or solvent for oil-based paint.
- Flush the system with clean water or solvent until fluid runs clear from the spray gun and return hose. This might take a few minutes, but it’s important to get all the old paint out.
- Wipe down exterior parts and dry all accessories completely to prevent rust and paint buildup. Don’t rush this—any moisture left behind can cause problems later.
- Reassemble all components securely and store the sprayer in a heated environment using protective storage fluid. This keeps your sprayer in good shape and ready for next time.
Prepare the Sprayer for Cleaning

Before you begin cleaning your airless paint sprayer, make certain to turn it off and unplug it to keep yourself safe. Once the power is off, release any remaining pressure by activating the spray gun and slowly opening the pressure control valve. This step prevents accidental sprays and reduces risk.
Next, remove the spray tip, filter, and hose to prepare for thorough cleaning. Empty the paint container, then wipe away any excess paint from the machine’s exterior with a clean cloth.
Finally, get your cleaning fluids ready—water works for latex paints, while mineral spirits or windshield washer fluid suit oil-based paints. Having the right cleaning fluids on hand ensures you’ll effectively flush out paint residues and keep your sprayer in excellent condition.
Remove Excess Paint From the System

Once you’ve prepped your sprayer and gathered the right cleaning fluids, start removing excess paint from the system by pushing paint out of the spray gun at low pressure. Hold the gun away from surfaces and trigger it to expel the remaining paint until the flow stops. This prevents paint from drying inside the system.
Next, turn off your paint sprayer and depressurize it before disassembling or continuing to clean. Always clean the spray tip and nozzle thoroughly to avoid clogs.
After removing excess paint, flush the sprayer with storage fluid to protect internal components during storage. This step helps keep your equipment in good shape and ready for the next use. Taking these actions ensures your paint sprayer stays clean and functions smoothly over time.
Wipe Down Exterior Components
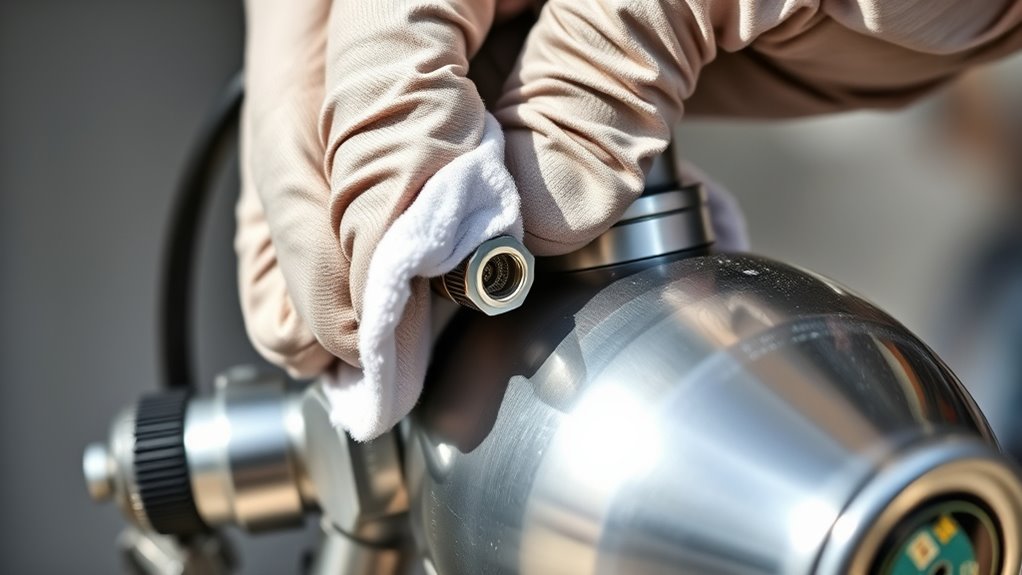
Before you start wiping down the exterior components, make sure to remove any excess paint from the sprayer. Use a clean, damp cloth to thoroughly clean away paint residue on the gun, hoses, and motor housing.
Doing this regularly prevents paint from drying and makes future cleanings much easier. It’s a simple step that really saves you time later on. Just a quick wipe, and you’re good to go!
Remove Excess Paint
A damp cloth or rag works best to gently wipe down the exterior of your airless paint sprayer, removing any leftover paint or overspray. Focus on areas like the spray gun, nozzle, trigger, and hose connections to remove excess paint before it dries.
This helps maintain appearance and prevents damage or clogs. For stubborn spots, use a mild solvent or water if the paint is still wet. Regularly cleaning the exterior keeps your sprayer looking good and makes future cleanings easier.
| Area to Clean | Why It’s Important |
|---|---|
| Spray Gun & Nozzle | Prevent dried paint buildup |
| Trigger Area | Maintain smooth operation |
| Hose Connections | Avoid clogs and damage |
Clean Residue Thoroughly
Although it might seem tedious, wiping down the exterior components of your airless paint sprayer after each use guarantees paint buildup and assures smooth operation. Neglecting residue on the exterior can lead to clogs and damage.
For effective cleaning, focus on these key steps:
- Use a clean cloth or rag to wipe all exterior surfaces thoroughly.
- Pay special attention to the gun, hose, and spray tip where residue tends to accumulate.
Dampening the cloth with water or a mild cleaning solution helps lift dried paint. Regularly inspect the sprayer for paint splatters or buildup.
Make sure the exterior is completely dry before storing to prevent rust. This routine keeps your sprayer in top shape and avoids costly repairs caused by dried residue.
Prevent Paint Drying
Why let paint dry and harden on your sprayer when a quick wipe can prevent it? After each use, take a clean rag or paper towel and thoroughly wipe down the exterior components.
Focus on the gun, hose, and nozzle areas where leftover paint tends to accumulate. Dampening the cloth slightly with water or a cleaning solution can help remove stubborn spots.
This simple step of exterior cleaning stops paint drying on your sprayer’s surfaces, saving you from tough buildup later. Regularly wiping down your sprayer not only improves maintenance but also ensures it performs at its best every time.
Flush Hoses and Spray Tips Thoroughly
To clean your airless paint sprayer properly, you’ll want to flush the hoses and spray tips thoroughly. Run the sprayer at full pressure with clean water or a suitable cleaning fluid to remove any leftover paint.
Make sure the fluid flows clearly from the spray tip and return hose to confirm everything’s clean. This step is super important to keep your sprayer working smoothly next time you use it.
Effective Hose Flushing
When you turn your sprayer to full pressure and run it for 20 to 30 seconds, you’ll flush out residual paint from the hoses effectively. Proper hose flushing is key to system maintenance and preventing clogs.
Hold the hose firmly and move it quickly in different directions during flushing to clean hose walls thoroughly. Use clean water or approved cleaning fluids like windshield washer fluid for best results.
Make sure you see blue fluid flowing from the spray gun and return hose to confirm complete cleaning. Finally, avoid leaving water in the hoses after cleaning to prevent rust and freezing damage.
Keep these tips in mind for effective hose flushing:
- Run sprayer at full pressure for 20-30 seconds
- Move hose quickly in varied directions
- Use appropriate cleaning fluids
- Look for clear blue fluid during flushing
- Drain hoses completely after cleaning
Spray Tip Cleaning
Although flushing the hoses is essential, cleaning the spray tip thoroughly guarantees your airless paint sprayer performs at its best. Start by removing the spray tip and soaking it in warm water or a cleaning solution to loosen paint residues.
Next, use a brush or a tip cleaning tool to scrub both the inside and outside of the spray tip, making sure all clogs are cleared. When flushing the hoses, turn the sprayer on at full pressure with water or cleaning fluid to push out leftover paint.
Hold the hose firmly and move it quickly to rinse the entire interior. Check that the spray tip and hoses are clean by looking for a clear, blue fluid flow during flushing.
This thorough process keeps your sprayer in top condition. It’s a bit of effort, but totally worth it for smooth, consistent spraying every time.
Pressurize and Run Cleaning Fluid Through the System
Since thorough flushing is key, you’ll want to turn on your sprayer and set it to full pressure before running the cleaning fluid through the system. Pressurize the unit, then flush cleaning fluid or water through the hoses and pump for 20-30 seconds.
Make sure to hold the spray gun firmly and move it in different directions to clean internal surfaces. Keep an eye out for blue cleaning fluid from the gun and return hose—that’s a good sign the system is getting clean.
Avoid leaving cleaning fluid or water inside the sprayer to prevent rust or freezing. If needed, repeat flushing until the fluid runs clear.
This process guarantees all residual paint and debris are dislodged. It helps protect your sprayer and keeps it performing well for future use.
Clean and Inspect Filters and Accessories
After flushing the cleaning fluid through your sprayer, turn your attention to the spray tip and filters. Remove and inspect these parts regularly to spot paint buildup or obstructions.
For effective cleaning, swish the filters in water or a cleaning solution to eliminate dried paint particles. Use a small brush or needle to clear debris lodged in the spray tip or filter screen.
During your inspection, check for any damage or heavy clogs in the filters. Replace any filters that are damaged or heavily clogged to keep your sprayer working smoothly and maintain ideal spray quality.
Finally, make sure all accessories are thoroughly dried before reassembling to prevent rust and mold growth. This thorough cleaning and inspection will extend your sprayer’s life and performance.
Store the Sprayer Properly for Long-Term Care
To keep your airless paint sprayer in top condition during long-term storage, you need to fill it with a protective storage fluid such as pump armor, mineral spirits, or windshield washer fluid. Run the system until the blue fluid appears from the gun and return hose to ensure the fluid circulates fully.
Proper cleaning and maintenance before storage are essential to avoid damage and extend your sprayer’s lifespan. Remember these key steps for effective storage:
- Perform a thorough cleaning before storage
- Fill with a suitable storage fluid to safeguard internal parts
- Circulate the fluid completely through the system
- Clean the filter regularly to prevent debris buildup
- Store the sprayer in a heated environment to prevent freezing and rust
Following these tips guarantees your sprayer stays ready for the next project. It’s really not that complicated, and taking these steps will save you a lot of headaches down the road.
Frequently Asked Questions
What Is the Best Way to Clean an Airless Spray Gun?
The best way to clean an airless spray gun is to release paint at low pressure, soak and scrub the tip, flush with water or cleaner, brush fluid passages, then reassemble and test spray to guarantee it’s fully clean.
Start by releasing the paint at a low pressure to get rid of most of it. Next, soak the tip and give it a good scrub to break down any stubborn paint.
After that, flush the gun with water or a suitable cleaner to wash out the remaining residue. Don’t forget to brush the fluid passages thoroughly.
Once everything’s clean, put the spray gun back together. Finally, do a test spray to make sure it’s completely clean and ready to use.
Can You Run Water Through a Paint Sprayer to Clean It?
Imagine flushing a river through your sprayer—yes, you can run water through it to clean out paint. Just crank the pressure, rinse thoroughly, and don’t leave moisture inside, or you risk rust and damage later.
It’s like giving your sprayer a good bath. Just make sure you dry it well so it stays in top shape!
How to Properly Clean a Graco Paint Sprayer?
You disconnect your Graco sprayer and relieve the pressure first. Then, remove and clean the tip and filters thoroughly.
Next, flush the sprayer with water or a cleaning solution to get rid of any leftover paint. Don’t forget to wipe down the exterior to keep it looking good.
Finally, store the sprayer with the recommended fluid inside. This helps prevent damage and keeps your equipment ready for the next job.
What Is the Number One Rule When Using Airless Spray Guns?
You might think safety’s obvious, but the number one rule with airless spray guns is to always relieve pressure before cleaning or disassembling.
Don’t skip it—it prevents injury and protects your equipment from damage. It’s a simple step that makes a big difference!
Conclusion
By following these simple steps, you’ll keep your airless paint sprayer running smoothly and extend its lifespan. For example, imagine Sarah, who neglected cleaning her sprayer after a big project and ended up with clogged tips and wasted paint.
She learned the hard way, but after switching to this routine, her sprayer works like new every time. Take a little time now, and you’ll save yourself frustration and money later.
Regular cleaning of your airless paint sprayer not only prevents clogs but also ensures consistent spray performance. Keeping your sprayer clean means fewer repairs and more efficient painting jobs. So, invest a few minutes in cleaning after each use, and your equipment will reward you with reliable operation and a longer life.