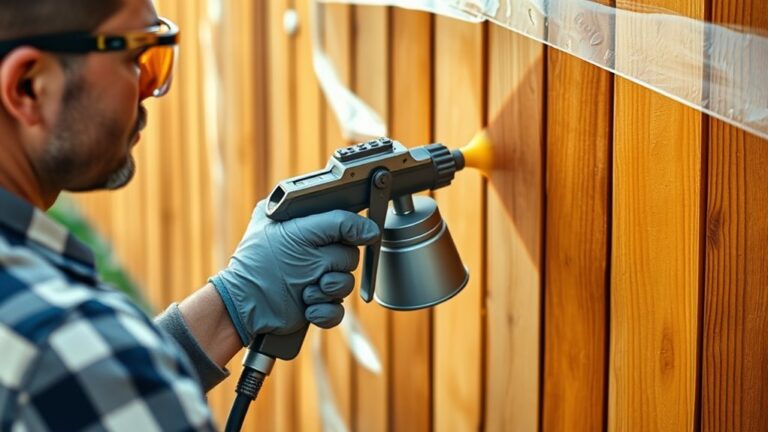
How to Use a Paint Sprayer on Walls in 7 Easy Steps
To use a paint sprayer on walls, start by cleaning and repairing the surface to ensure a smooth finish.
Next, protect floors and trim with masking materials to avoid any accidental paint splatters.
Choose and assemble your sprayer, making sure it’s suitable for the type of paint you’re using.
Mix and thin the paint as needed for the best spray consistency, then test the spray pattern on a scrap piece of material.
Hold the sprayer about 12 inches away from the wall and apply the paint with steady, overlapping strokes to cover evenly.
Once you’re done, clean and maintain your equipment properly to keep it in good working condition.
If you want to master each step for flawless results, keep exploring these tips and tricks to get that perfect, professional-looking paint job every time.
Key Takeaways
– Clean and repair walls, then protect floors, trim, and fixtures with tape and plastic sheeting before painting.
It’s all about prepping right to get the best finish.
– Assemble the sprayer, thin and strain paint, then test spray on a scrap surface to adjust settings.
Testing first helps avoid surprises on your walls.
– Hold the sprayer about 12 inches from the wall, using steady, overlapping strokes for even coverage.
Keep your hand moving smoothly so the paint goes on nice and even.
– Maintain a perpendicular spray angle and keep the trigger pressed only while moving to avoid buildup.
This way, you won’t end up with drips or thick spots.
– Clean the sprayer thoroughly after use and store it dry to ensure durability and performance.
Taking care of your sprayer means it’ll be ready for the next project.
Prepare the Walls for Painting

Before you start painting, make sure you thoroughly clean the walls with a TSP and water solution to remove grease, dust, and cobwebs. This cleaning step guarantees the paint adheres well and lasts longer.
Next, remove electrical covers, fixtures, and wall-mounted light fittings to achieve a smooth, professional finish. After that, focus on patching any holes, dents, or drywall damage using appropriate putty.
Feather and sand the patched areas carefully for a seamless surface. Once patched, wipe the walls with a dry cloth and vacuum to eliminate drywall dust, preventing imperfections during spraying.
Proper cleaning and patching set the foundation for a flawless paint job, so don’t skip these essential steps before you begin your paint sprayer project. It really makes all the difference!
Mask and Protect Surrounding Areas

Before you start spraying, gather essential masking materials like painter’s tape, plastic sheeting, and drop cloths to safeguard floors and trim. Cover all surfaces that won’t be painted to prevent overspray damage.
Carefully tape edges around windows, door frames, and baseboards to ensure sharp, clean lines. This way, you’ll keep everything looking neat and professional.
Essential Masking Materials
When you start using a paint sprayer, you’ll want to mask and protect surrounding areas carefully to prevent overspray and guarantee clean lines. Essential masking materials include painter’s tape and plastic sheeting.
Use high-quality, low-tack painter’s tape to cover edges of ceilings, trim, and window frames. This ensures clean paint lines without damaging surfaces when removed.
Protect areas beyond your painting zone by taping overlapping plastic sheeting over doorways and adjacent rooms. This creates a secure barrier against stray paint.
Cover electrical outlets, switches, and light fixtures with plastic caps or painter’s tape to keep them clean.
These masking materials help you maintain a tidy workspace and achieve professional-looking results. Plus, they make the painting process smoother and less stressful.
Protecting Floors and Trim
Along with protecting walls and fixtures, you’ll want to shield your floors and trim from paint overspray. Start by covering floors with thick kraft paper or plastic sheeting. Tape down edges securely to prevent any paint transfer.
Mask baseboards separately—apply painter’s tape along the edge first, then overlay plastic sheeting for clean lines and easy removal. Use painter’s tape around window frames, door jambs, and other trim, pressing firmly to seal gaps. This stops paint from seeping underneath.
Overlap plastic sheeting at corners and tape it tightly to create a seamless barrier. Remember, remove all masking materials only after the paint is fully dry. That way, you avoid smudging or damaging your fresh work.
Proper masking ensures a professional, clean finish every time. It’s worth taking the time to do it right!
Select and Set Up the Paint Sprayer

Selecting the right paint sprayer is essential to achieving a smooth, even finish on your walls. You’ll want to pick an airless model like the Graco Magnum that matches your paint type and project size.
Start by assembling the sprayer according to the manufacturer’s instructions. Make sure the hose is securely connected to both the unit and paint container.
Strain your paint to avoid clogs and ensure consistent flow. Next, adjust the pressure settings based on your paint’s viscosity—walls typically require between 1500-3000 PSI.
Before you begin, test the spray pattern on a scrap surface or cardboard. This helps you confirm even coverage and proper flow.
Fine-tuning these elements guarantees your airless paint sprayer is set up for a flawless wall finish. It’s worth taking the time to get it right!
Mix and Thin the Paint Properly
Before you start spraying, make sure to mix your paint thoroughly to get an even consistency.
Thinning the paint correctly helps it flow smoothly through the sprayer, so follow the manufacturer’s guidelines closely.
Using tools like a paint strainer guarantees your paint stays free of lumps that could clog the nozzle.
Paint Mixing Techniques
When you prepare your paint for spraying, you need to mix it thoroughly to guarantee uniform color and consistency. Proper paint mixing ensures smooth application and prevents clogs.
Follow these essential paint mixing techniques:
- Use a paddle or drill attachment for even mixing.
- Thin the paint as per manufacturer’s guidelines, usually with water for water-based paints.
- Strain the paint through a paint strainer to remove lumps or debris.
- Test spray on a scrap surface to check flow and coverage.
- Keep the paint covered and stir regularly to maintain consistency.
These steps help you achieve the right viscosity and avoid nozzle blockages. That way, your paint sprayer works efficiently and you get a flawless finish every time.
Importance of Thinning
Mixing your paint properly sets the stage for effective thinning, which plays a key role in how well your sprayer performs. Thinning reduces paint viscosity, ensuring smooth flow through the paint sprayer nozzle and preventing clogs.
Always follow the manufacturer’s recommended thinning ratio—usually 10-20% water for latex paints—to keep coverage consistent. Stir your paint thoroughly before thinning to maintain even texture and color.
Test the spray pattern on a scrap surface, then adjust thinning if you notice drips, uneven coverage, or overspray. It’s all about finding that sweet spot to get the best results.
| Thinning Ratio | Effect on Flow | Sprayer Performance |
|---|---|---|
| 0% | Thick | Likely clogging |
| 10% | Moderate | Smooth, even spray |
| 15% | Ideal | Best coverage |
| 20% | Thin | Possible overspray |
| >20% | Very thin | Drips, poor control |
Tools for Consistency
Although it might seem straightforward, achieving consistent paint flow requires the right tools and techniques to mix and thin your paint properly. Proper paint consistency is key to getting smooth coverage with your paint sprayer and preventing clogging in the spray gun.
Here’s what you need to ensure a flawless application:
- Use a paddle or drill attachment to mix paint thoroughly before spraying.
- Thin the paint following the manufacturer’s recommended ratio (usually 10-20% water or solvent).
- Strain paint through a fine mesh paint strainer to remove lumps and debris.
Test viscosity with a flow cup or spray on a scrap surface to adjust thinning as needed. Stir paint consistently during use to keep pigment even and avoid separation.
These tools and steps keep your paint sprayer running smoothly and your walls looking professional. It’s all about the details!
Test the Sprayer and Adjust Settings
Before you start painting, fill the sprayer with diluted paint and test it on a scrap surface to guarantee even flow and coverage. Watch the spray pattern closely—if you notice drips, sputters, or uneven spots, it’s time to make adjustments.
Adjust the sprayer’s pressure and spray tip according to the paint type and surface, following the manufacturer’s guidelines. Holding the sprayer about 12 inches from the surface helps maintain consistency.
Fine-tuning the pressure ensures a smooth, even spray without overspray or clogging. Keep testing and tweaking these settings until you get a uniform, fine mist.
This step is vital to avoid costly mistakes on your walls and achieve professional-looking results. So, take your time and get it right before moving on!
Apply Paint With Consistent Technique
When you start applying paint, keep the sprayer steady about 12 inches from the surface to guarantee even coverage. Maintaining a consistent distance is key to achieving a smooth spray pattern and avoiding drips.
Keep the sprayer steady about 12 inches from the surface for smooth, even paint coverage without drips.
Move the sprayer in straight, overlapping passes to ensure no spots are missed. Remember to keep the spray perpendicular to the wall for uniform application.
Here are essential tips to apply paint with consistent technique:
- Hold the sprayer about 12 inches from the wall
- Use steady, straight passes with consistent overlap
- Keep the spray pattern perpendicular to the surface
- Release the trigger only while moving to prevent buildup
- Practice on a scrap surface to perfect your technique
Following these steps helps you achieve an even finish with minimal touch-ups. Just take your time, and you’ll get the hang of it!
Clean and Maintain the Paint Sprayer
Since paint can dry quickly and clog your sprayer, you should rinse it immediately after use with water or the proper cleaning solution. This helps keep everything flowing smoothly and avoids any blockages.
To clean and maintain your paint sprayer, disassemble the nozzle, gun, and hoses. Then, scrub each part thoroughly to remove any residue. It’s a bit of work, but totally worth it for a sprayer that works like new.
Use a cleaning kit or pump armor to flush the system, making sure the spray tip and internal components are clear. Don’t forget to wipe the exterior with a damp cloth.
Before you store it away, check for clogs or damage. Keep your sprayer in a dry, clean place with protective covers to avoid dust and other issues.
| Step | Action | Purpose |
|---|---|---|
| Rinse | Flush with solution | Prevent paint drying inside |
| Disassemble & Clean | Brush all parts | Remove residual paint |
| Store | Cover and dry storage | Avoid dust and damage |
Frequently Asked Questions
How to Use a Paint Sprayer on Walls for Beginners?
You’ll prep the wall and mask the surrounding areas first. Then, fill the sprayer with paint and adjust the settings to suit your project.
Hold the sprayer about 12-18 inches away from the wall. Spray in steady vertical strokes for an even coat.
Once you’re done, make sure to clean everything thoroughly. That way, your sprayer stays in good shape for next time.
What Are the Most Common Mistakes When Using Spray Paint?
Don’t bite off more than you can chew—common mistakes include inconsistent speed, wrong nozzle or pressure, poor masking, and skipping cleaning.
These errors cause streaks, drips, overspray, and clogs, ruining your paint job.
Taking your time and paying attention to these details can make all the difference!
Do You Dilute Paint When Using a Sprayer?
Yes, you usually dilute paint when using a sprayer to guarantee smooth flow and even coverage.
Follow the manufacturer’s guidelines for dilution ratios, typically around 10% to 20%. And always stir the paint thoroughly after mixing.
What Is the Trick to Spray Painting?
Think of spray painting like dancing—keep your movements smooth and steady. The trick is to hold the sprayer about 12 inches away, overlap your strokes by 50%, and maintain a consistent pace for flawless coverage every time.
It’s all about rhythm. If you rush or stay still, the paint won’t go on evenly. Just keep a steady hand and you’ll nail it!
Conclusion
Using a paint sprayer on your walls is like wielding a magic wand that transforms any space quickly and smoothly. By preparing your walls and protecting the area, you set the stage for a professional-looking job.
Next, setting up your sprayer and applying paint with steady hands helps you achieve a flawless finish every time. It’s all about consistent, even strokes for that perfect coat.
Just remember to clean and maintain your sprayer afterward to keep your tool ready for the next project. Proper care ensures your paint sprayer stays in top shape and performs well for years to come.
With these easy steps, you’re all set to turn your walls into a masterpiece effortlessly. Using a paint sprayer on walls not only speeds up the painting process but also gives you smooth, even coverage that brushes or rollers can’t match. So, grab your sprayer, follow these tips, and watch your walls transform beautifully.