What to Clean a Paint Sprayer With €“ 7 Essential Steps
To clean a paint sprayer effectively, you’ll need the right cleaning supplies. For latex paints, water works perfectly, but if you’re dealing with oil-based paints, you’ll need a solvent. Setting up two buckets is a smart move—one filled with cleaning fluid and the other for waste.
Start by flushing out any leftover paint by running the sprayer with the cleaning fluid. This helps clear the internal parts and prevents clogs.
Next, take the sprayer apart and soak the spray tip and guard to loosen dried paint.
Don’t forget to clean the filters thoroughly. Give all the components a good scrub to remove any stubborn residue.
Finally, rinse everything one more time and dry all parts completely.
Keep following these steps regularly, and you’ll master paint sprayer upkeep, ensuring it lasts longer and works better every time you use it.
Key Takeaways
- Use warm, soapy water for water-based paints and mineral spirits or recommended solvents for oil-based paints to clean the sprayer.
- Prepare two buckets: one with cleaning fluid and one empty to catch waste paint and prevent contamination.
- Flush the sprayer and its components with the appropriate cleaning fluid until all paint residue is removed.
- Soak and gently scrub spray tips, guards, and filters with suitable cleaning fluid, then rinse and dry completely.
- Store all cleaned and dried parts in a dry environment, inspecting regularly for clogs or damage before reassembly.
Cleaning a paint sprayer doesn’t have to be a headache. Just make sure you’re using the right cleaning fluid depending on your paint type.
And always have two buckets ready—that way, you keep your cleaning fluid fresh and avoid mixing in old paint.
Flush everything thoroughly so no paint is left behind—that’s key to keeping your sprayer working smoothly.
Don’t forget to give those small parts like spray tips and filters some extra attention. A little soaking and scrubbing goes a long way.
Once everything is clean and dry, store it properly. And before you use it next time, check for any clogs or damage. It’ll save you a lot of trouble later on!
Gather the Appropriate Cleaning Supplies
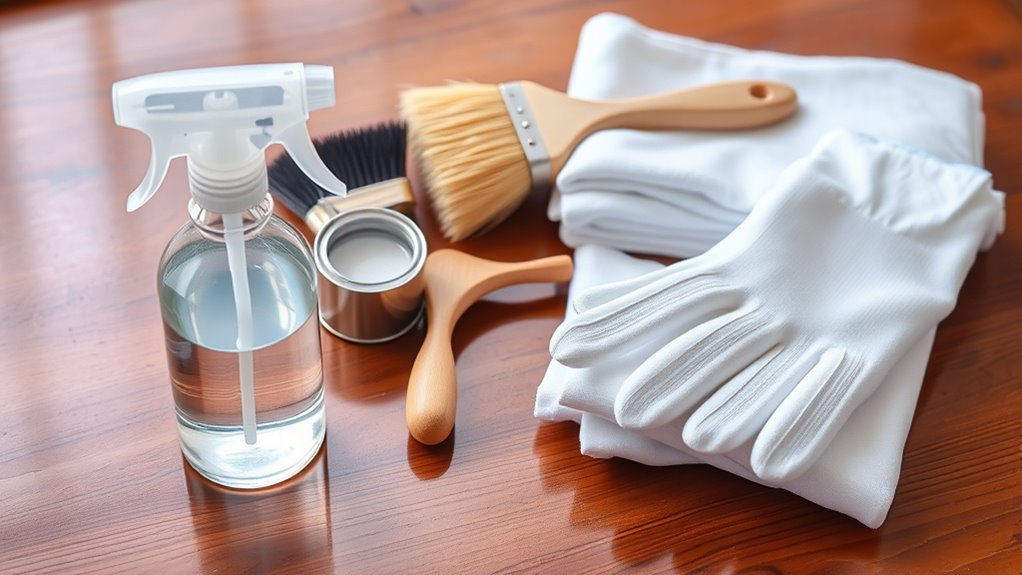
Where should you start when cleaning a paint sprayer? First, gather the appropriate cleaning supplies.
If you’ve used water-based paint, warm, soapy water is your best bet for cleaning—this helps remove all residue effectively. For oil-based coatings, you’ll need mineral spirits or a solvent recommended by the manufacturer to avoid damaging your sprayer.
Always check the paint container’s instructions to confirm the right cleaning solution, so you don’t risk harming any components. Keep a supply of compatible fluids, like water or the proper solvent, ready before you begin.
Having the correct cleaning fluids on hand ensures a smooth process and prevents cross-contamination during cleaning. Starting with the right supplies sets you up for success.
Set Up Buckets for Cleaning and Rinsing

Before you start cleaning your paint sprayer, set up two buckets—one filled with warm, soapy water or mineral spirits depending on your paint type, and another empty bucket for waste or rinsing. This setup helps you efficiently manage the cleaning process without cross-contaminating your clean water.
Keep the intake tube submerged in the clean water bucket to ensure thorough rinsing. Aim the spray gun into the waste bucket to catch residual paint and prevent messes.
- Use warm, soapy water for water-based paints or mineral spirits for oil-based coatings.
- Keep a waste bucket handy to collect used cleaning fluid.
- Submerge the intake tube in clean water for effective rinsing.
- Direct spray output into the waste bucket to avoid spills and maintain cleanliness.
Flush Out Remaining Paint From the Sprayer
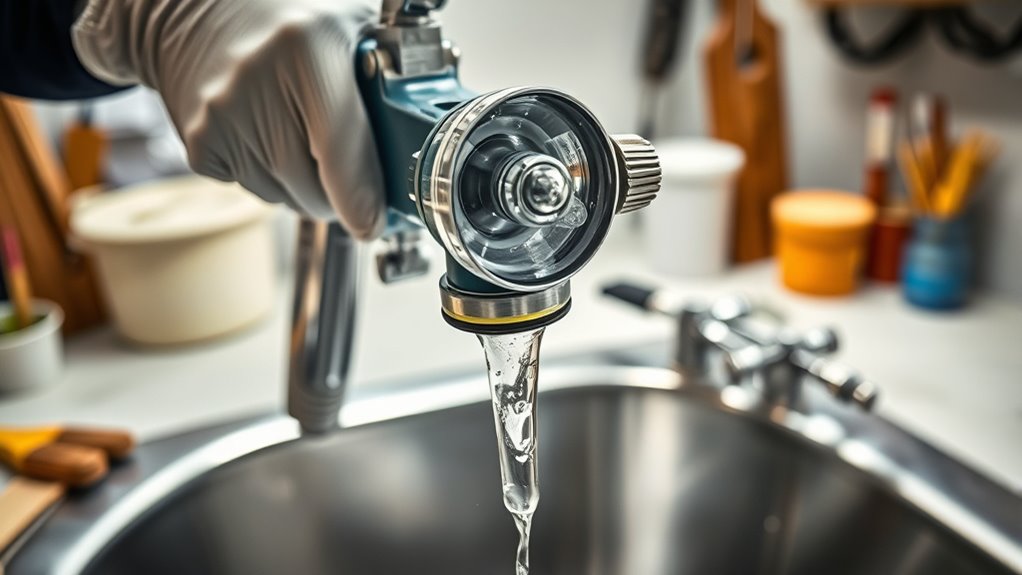
Start by draining any leftover paint from the sprayer into a waste bucket using the prime valve. Then, choose the right cleaning fluid—water or solvent depending on your paint type—and flush the system thoroughly.
Make sure to run the sprayer long enough to clear all residue, especially if you’re working with longer hoses. This way, you avoid clogs and keep everything running smoothly for next time.
Drain Residual Paint
How do you guarantee your paint sprayer is properly cleared of leftover paint? Start by depressurizing the sprayer and removing the spray tip to avoid accidental spraying. Then, use the spray gun to flush out residual paint into a waste container.
To fully drain residual paint, flush with clean water or the proper solvent at low pressure until what comes from the nozzle runs clear. Keep in mind:
- Remove and clean the spray tip separately to prevent clogs.
- Always flush with clean water for water-based paints and use recommended solvents for oil-based paints.
- Repeat flushing multiple times if switching paint types.
- Dispose of leftover paint and cleaning fluids responsibly.
Following these steps ensures your sprayer stays clog-free and ready for your next job. It’s a quick routine that really pays off!
Select Proper Cleaning Fluid
When flushing out your paint sprayer, choosing the right cleaning fluid is crucial to protect the equipment and remove all paint residue effectively. For water-based paints, use warm, soapy water as your cleaning fluid.
If you’ve used oil-based coatings, opt for mineral spirits or a solvent recommended for that paint type. Matching the cleaning fluid to your paint prevents internal damage and ensures thorough removal.
Run the cleaning solution through the sprayer until the outflow runs clear, usually about 2-3 minutes. For proper care, dip the intake tube into a second bucket with fresh cleaning fluid during the final rinse to eliminate any remaining residue.
Avoid using unsuitable solvents or water, as they can cause clogs or damage internal parts, compromising your sprayer’s performance. It’s always better to be cautious and use the right cleaner for your sprayer’s longevity.
Flush System Thoroughly
Although you may think rinsing once is enough, you’ll need to flush your paint sprayer thoroughly to remove all remaining paint inside the system. Properly cleaning your sprayer means running clean water or the right solvent through the entire setup until the outflow runs clear.
This flush system process prevents clogs and keeps your sprayer ready for next time.
To flush system effectively, remember to:
- Use warm, soapy water for water-based paints, followed by a clean water rinse.
- Run mineral spirits or recommended solvents for oil-based paints.
Make sure to flush the entire hose, tip, and gun length. Keep flushing for 30 seconds after the fluid clears to remove any residual paint.
This thorough flush system step is key to cleaning your sprayer well and extending its lifespan.
Disassemble and Clean the Spray Tip and Guard
Since the spray tip and guard are essential for a smooth finish, you should remove and clean them thoroughly after each use. Start by detaching the spray tip and guard from the sprayer so you can inspect them closely.
Soak both parts in the appropriate cleaning fluid—water works for latex paint, while a solvent is best for oil-based paints. After soaking, gently scrub the nozzle and guard with a soft-bristle brush to eliminate any paint residue and prevent clogs.
Make sure to check the spray tip carefully for damage or wear. You want to see that the orifice is round and clear.
Once everything is clean, dry all parts completely before reassembling. This helps avoid rust and keeps your spray pattern looking perfect for your next project.
Clean the Gun and Manifold Filters Thoroughly
Start by carefully removing the gun and manifold filters to avoid damaging them. Soak the filters in the right cleaning fluid based on your paint type, then gently scrub away any residue.
Make sure to inspect and rinse them thoroughly before drying to keep your sprayer working smoothly. This way, everything stays clean and ready for your next project.
Filter Removal Techniques
When you remove the gun and manifold filters, handle them carefully and follow the manufacturer’s instructions to prevent damage. Proper filter removal is essential for an effective cleaning process and to avoid harming delicate components.
Start by gently detaching the filters without forcing them. Then, soak them in the right cleaning solution based on your paint type.
Keep these tips in mind during filter removal:
- Use appropriate tools or your hands carefully to avoid tearing filters.
- Soak filters in water for latex or mineral spirits for oil-based paints.
- Avoid applying excessive force that might damage the filter mesh.
- Inspect filters immediately after removal for clogs or damage before cleaning.
Following these steps ensures your filters stay intact and ready for thorough cleaning.
Proper Filter Cleaning
Although removing the filters is important, cleaning them thoroughly guarantees your paint sprayer performs reliably. After each job, soak the gun and manifold filters in the right cleaning fluid—water for latex or mineral spirits for oil-based paints.
Use a soft-bristle brush to gently scrub away any paint residue or debris, ensuring all pores are clear. This step is vital in filter cleaning when cleaning an airless paint system.
Inspect the filters for any tears or damage; replace them if needed to avoid clogs and maintain a consistent spray pattern. Rinse filters thoroughly with clean solvent or water, then dry completely before reassembling to prevent mold or corrosion.
Keep spare filters handy and clean them regularly to ensure peak spray performance. It really makes a difference in the long run!
Scrub the Spray Gun and Other Components
Since proper cleaning guarantees your paint sprayer performs well, you’ll want to gently scrub the spray gun, tip, and guard with a soft-bristle brush to remove paint residue and buildup.
Gently scrub the spray gun, tip, and guard with a soft-bristle brush to remove paint residue and buildup.
Soak the tips and guards in the right cleaning fluid—water for latex or mineral spirits for oil-based paints—before scrubbing.
After cleaning, inspect the nozzle orifice for clogs or damage. Rinse all parts thoroughly with fresh cleaning fluid to remove any leftover paint.
Remember to:
- Use a soft-bristle brush for gentle scrubbing
- Soak components in appropriate cleaning fluid first
- Check the spray gun nozzle for pinholes or irregularities
- Rinse parts well to eliminate residual paint or solvent
This careful cleaning helps maintain your spray gun’s efficiency and extends its lifespan.
Perform a Final Rinse and Dry All Parts
To guarantee your paint sprayer is completely clean, you’ll want to perform a final rinse using fresh water or mineral spirits, depending on the paint type. Move the intake tube into a second bucket filled with fresh cleaning fluid and run the sprayer briefly to flush out any remaining paint or solvent.
This final rinse assures no residue lingers in the system. After rinsing, carefully dry all parts, including filters, tips, and seals, to prevent mold and corrosion.
Before reassembling or storing your sprayer, visually inspect every component to confirm no debris or leftover cleaning fluid remains. Taking these steps will keep your paint sprayer in top condition and ready for your next project.
Frequently Asked Questions
What’s the Best Thing to Clean a Paint Sprayer With?
You should clean your paint sprayer with warm, soapy water for water-based paints and mineral spirits or proper solvents for oil-based paints.
Always follow manufacturer instructions to avoid damage and guarantee a thorough rinse to prevent clogs.
Keeping your sprayer clean not only extends its life but also ensures your next project goes smoothly. So, take your time with the cleaning process!
Can I Run Water Through My Paint Sprayer to Clean It?
You can run water through your paint sprayer if you used water-based paint. Over 70% of sprayer clogs happen because people don’t clean them properly.
Just make sure the sprayer is depressurized and disconnected before you start flushing it out. This helps avoid any accidents.
Do You Have to Clean a Paint Sprayer After Every Use?
Yes, you should clean your paint sprayer after every use. Doing so prevents clogs, buildup, and damage.
This helps ensure consistent performance and extends your sprayer’s lifespan. Plus, it saves you from costly repairs and downtime later. So, a little cleaning now goes a long way!
What Is the Number One Rule When Using Airless Spray Guns?
You should always depressurize the system before cleaning or maintenance—this rule prevents accidents.
In fact, over 60% of spray gun injuries happen when users skip this essential safety step, so never overlook it. Always take that extra moment; it’s worth it for your safety.
Conclusion
Remember, “a stitch in time saves nine.” Taking the time to clean your paint sprayer properly after each use prevents clogs and extends its life.
By gathering your supplies, flushing out paint, and thoroughly cleaning every component, you’ll keep your sprayer in top shape for future projects.
Don’t skip the final rinse and drying steps—these small efforts now will save you from big headaches later.
Keep your sprayer ready, and it’ll always perform at its best! Regular cleaning not only maintains its efficiency but also ensures smooth, professional results every time you paint. So, invest a little time in cleaning and enjoy hassle-free painting sessions ahead.